This Cottage Cheese Cheesecake is light and tender with 10 grams of protein in each slice. Made with 8 simple ingredients, no cream cheese, and right in your blender!
We also love this carrot cake cheesecake.
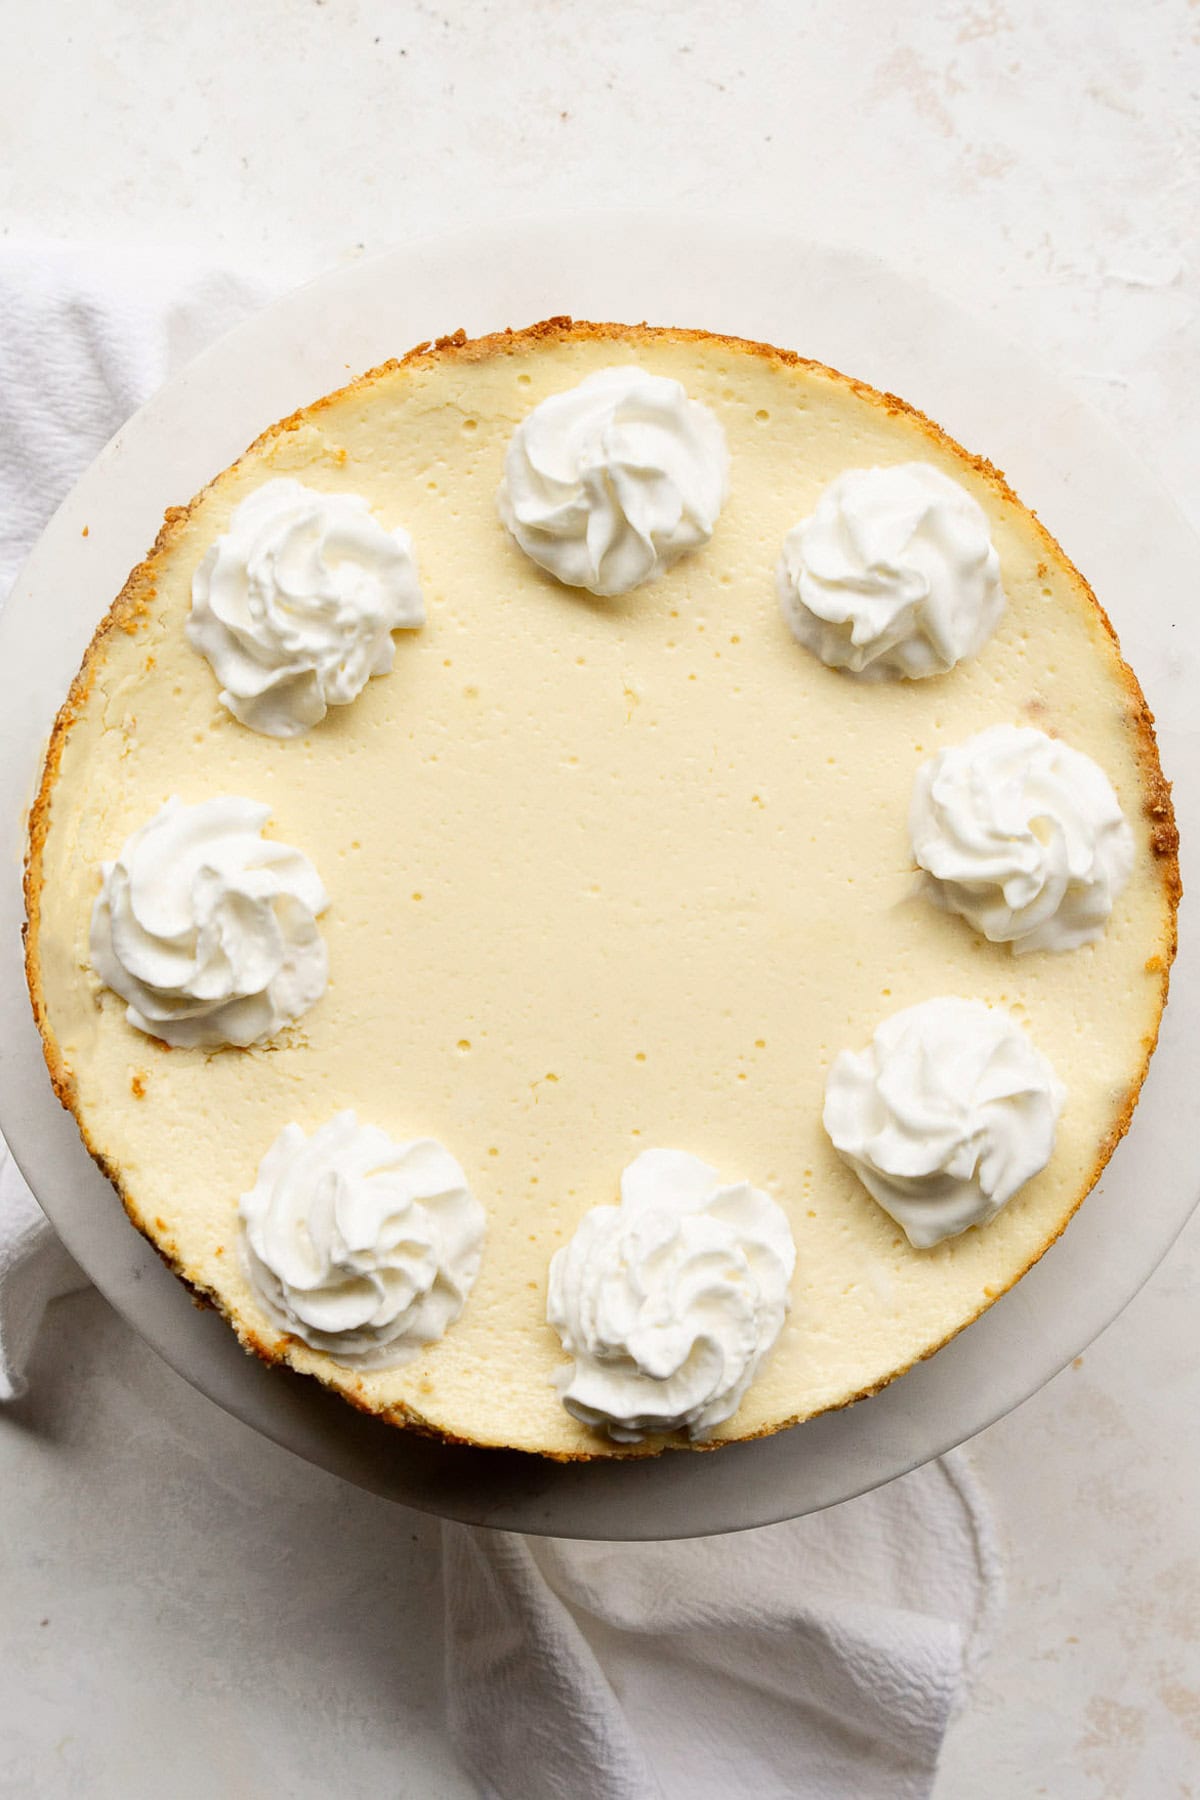
Table of Contents
I had already tried using Greek yogurt in a Greek yogurt cheesecake and cottage cheese in cottage cheese tiramisu, and thought adding cottage cheese to make a cottage cheese cheesecake to amp up the protein would be a great idea.
And it was! It added 4 extra grams per each slice. I was seriously impressed! This cheesecake is a perfect addition to both your high protein recipes and cake lineups! What’s not to love?!
Why You’ll Love This Recipe
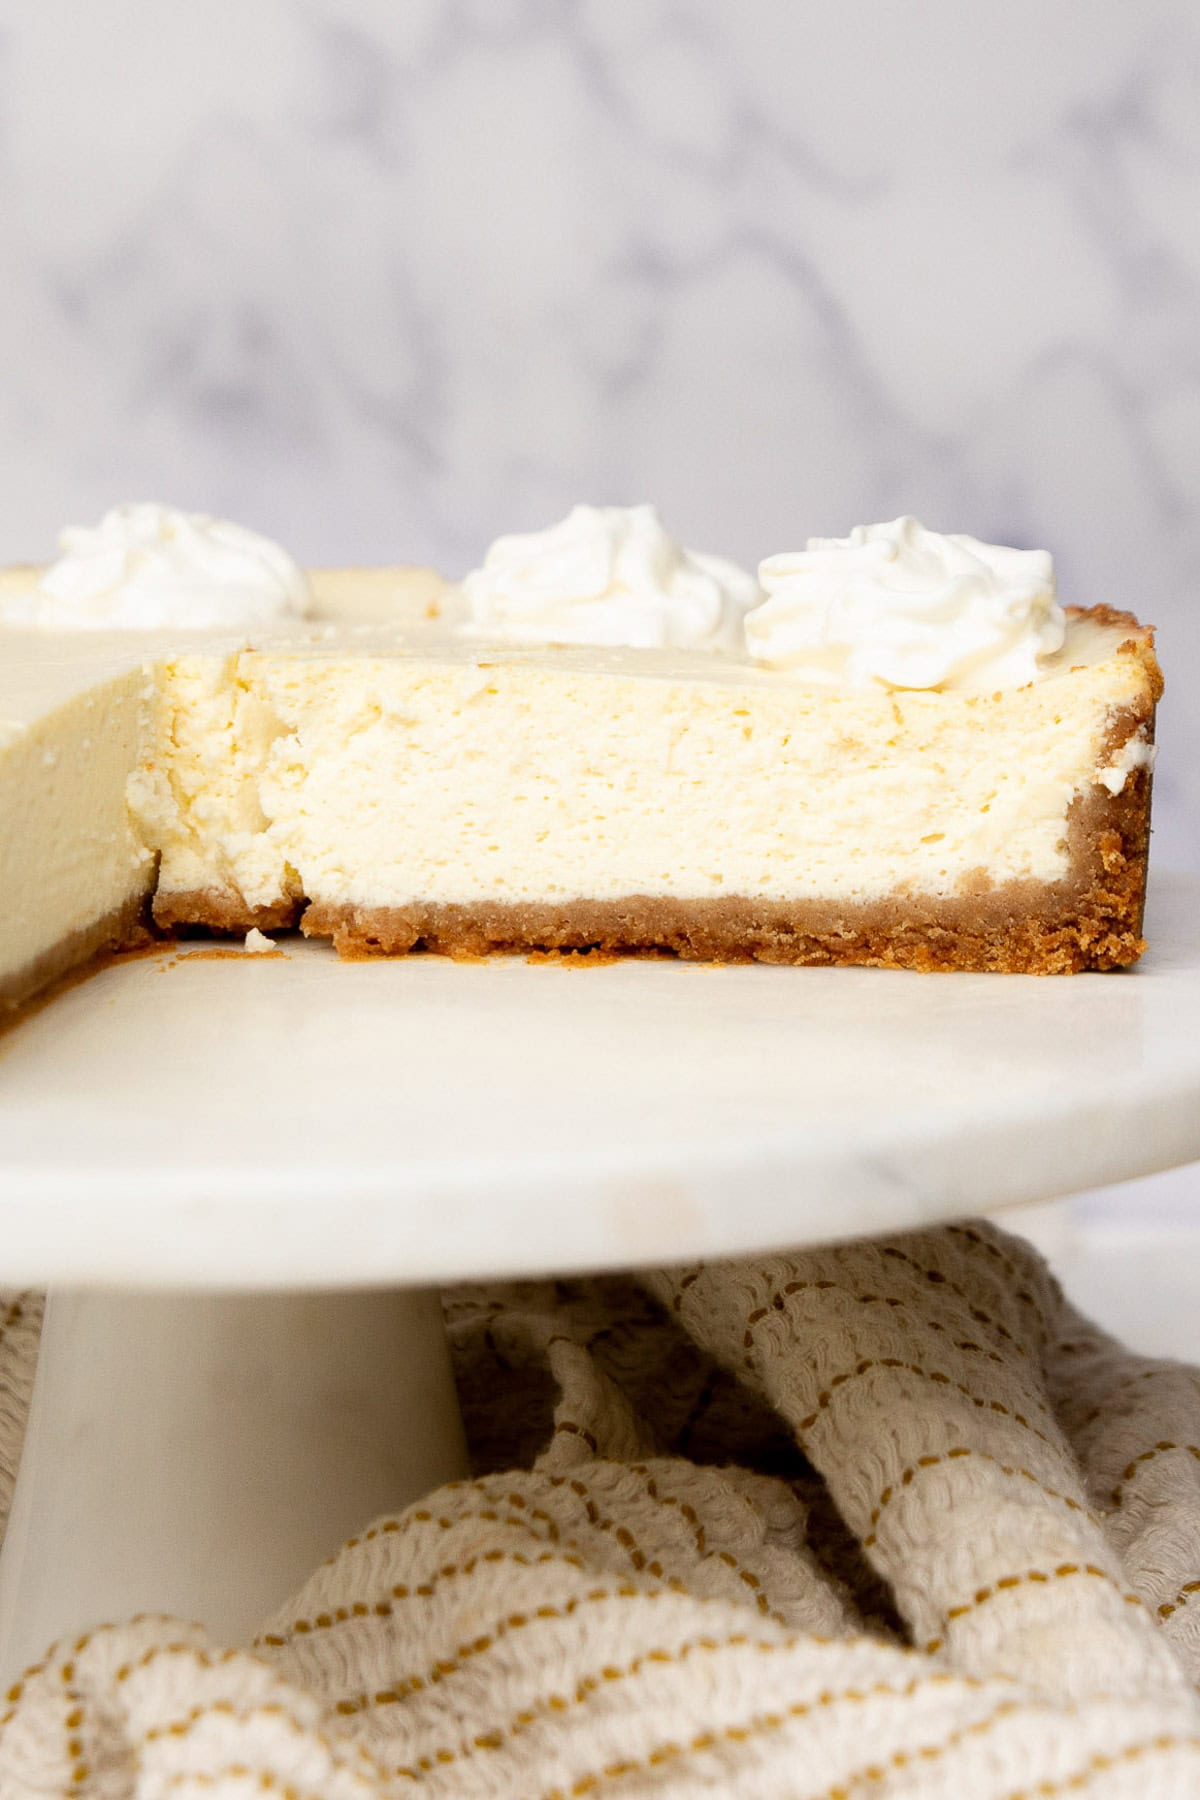
- Light and airy: It tastes like a light European dessert, not overly sweet and very tender. If you want even lighter, treat try this baked cottage cheese!
- No cream cheese: Skipping the cream cheese makes this cottage cheese cheesecake recipe lighter, creamier, and lower in fat.
- Packed with protein: Made with 2 naturally high-protein ingredients and no protein powder.
- Tastes like the real deal: You get all the flavor without the heavy ingredients.
Ingredients for Cottage Cheese Cheesecake
You’ll only need 8 simple, wholesome ingredients for this healthy dessert!
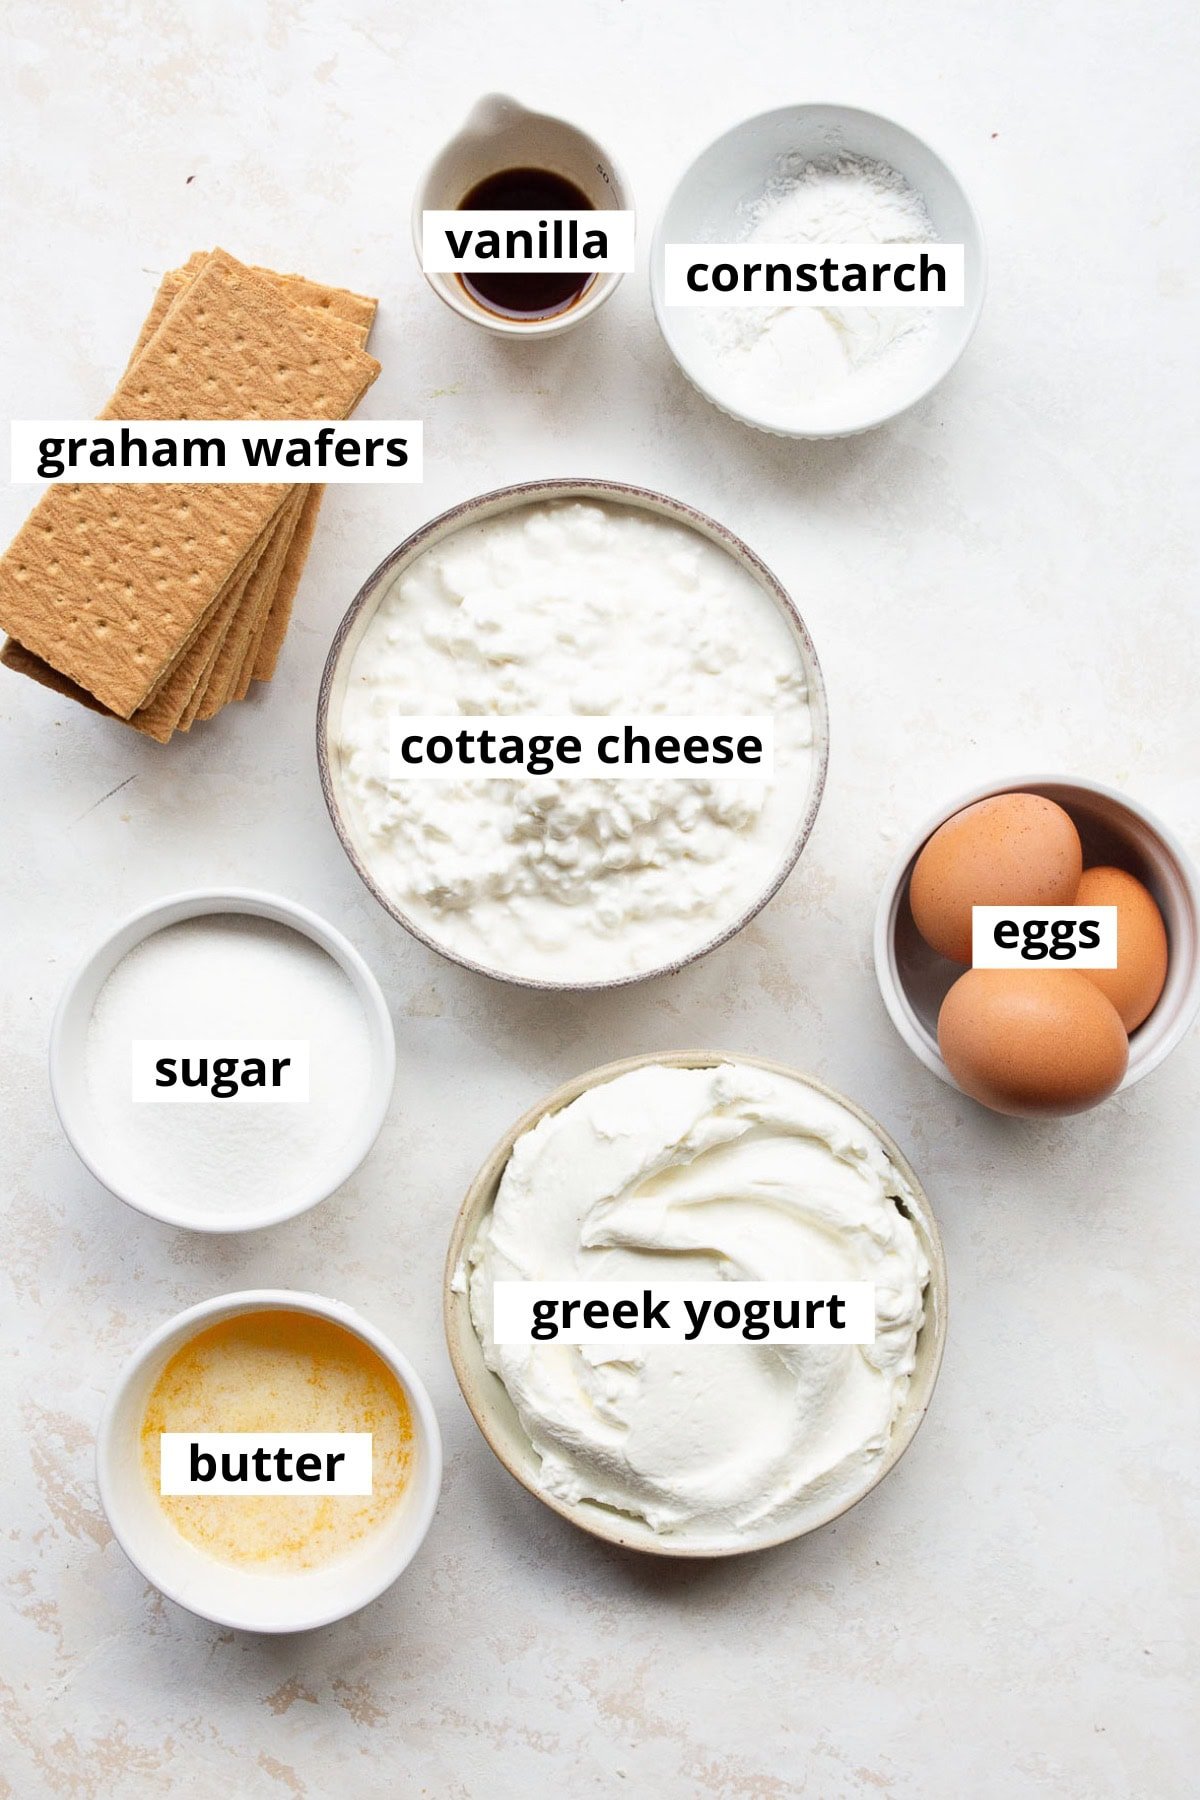
- Graham wafers: You’ll need 11 full sheet wafers or 1 1/2 cups crumbs.
- Butter: Melted butter binds the graham cracker crumbs together. Feel free to use salted or unsalted butter and make sure to melt the butter first, then measure it out.
- Sugar: I used cane sugar in both the crust and filling, but you can swap in granulated sugar or erythritol for a lower sugar option. Or try brown sugar in the crust for a caramel-like flavor.
- Cottage cheese: The star ingredient in all cottage cheese recipes! Use 2% or 4% cottage cheese for a velvety cheesecake texture.
- Greek yogurt: Adds a tangy, creamy richness to the cake. Be sure to use plain Greek yogurt and I recommend 2% fat or higher.
- Eggs: To bind the filling together and help create a light, fluffy texture.
- Pure vanilla extract: Essential for that classic, delicious flavor.
- Cornstarch: Helps thicken the filling and keeps it smooth and creamy. You can also use arrowroot powder or tapioca flour.
Dairy Tip
Some dairy should have fat! If you’re using 0% Greek yogurt, you have to use 2% or 4% cottage cheese. Otherwise your cheesecake with be too watery and lacking creaminess. Balance is key!
How to Make Cottage Cheese Cheesecake
Here’s a quick overview of how to make cheesecake with cottage cheese. It’s all made in a
blender and is super easy!
To make the crust:
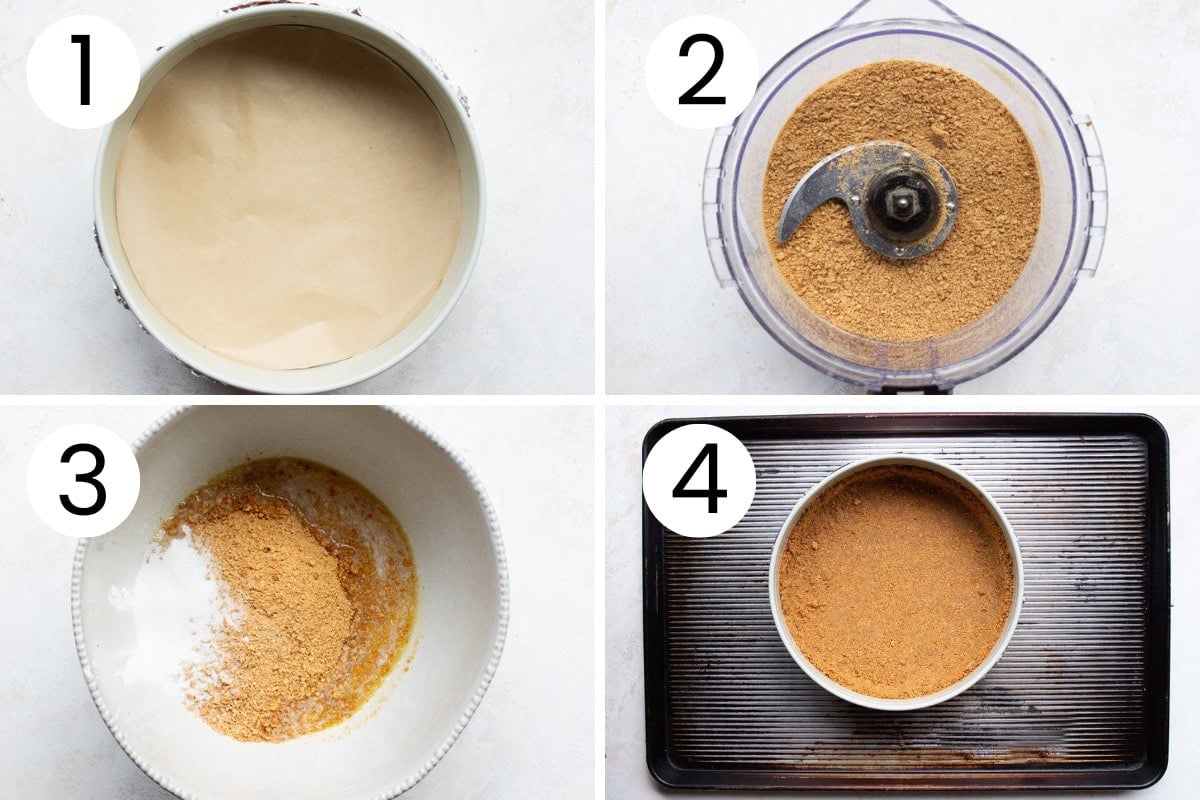
- Prep: Preheat your oven to 350 F. Line the bottom of a 9-inch springform pan with parchment paper and butter the sides. Next, wrap the bottom and sides of the pan with 3 layers of heavy-duty foil to prevent leaks.
- Prepare the crust: Pulse graham wafers in a food processor or blender until fine, then mix with melted butter and sugar in a bowl.
- Bake the crust: Press the mixture into the prepared pan. I level it with a spatula first then press it down with a glass, so it’s nice and even. Pop it in the oven for 10 minutes, then let it cool for another 10.
To make the filling and bake:
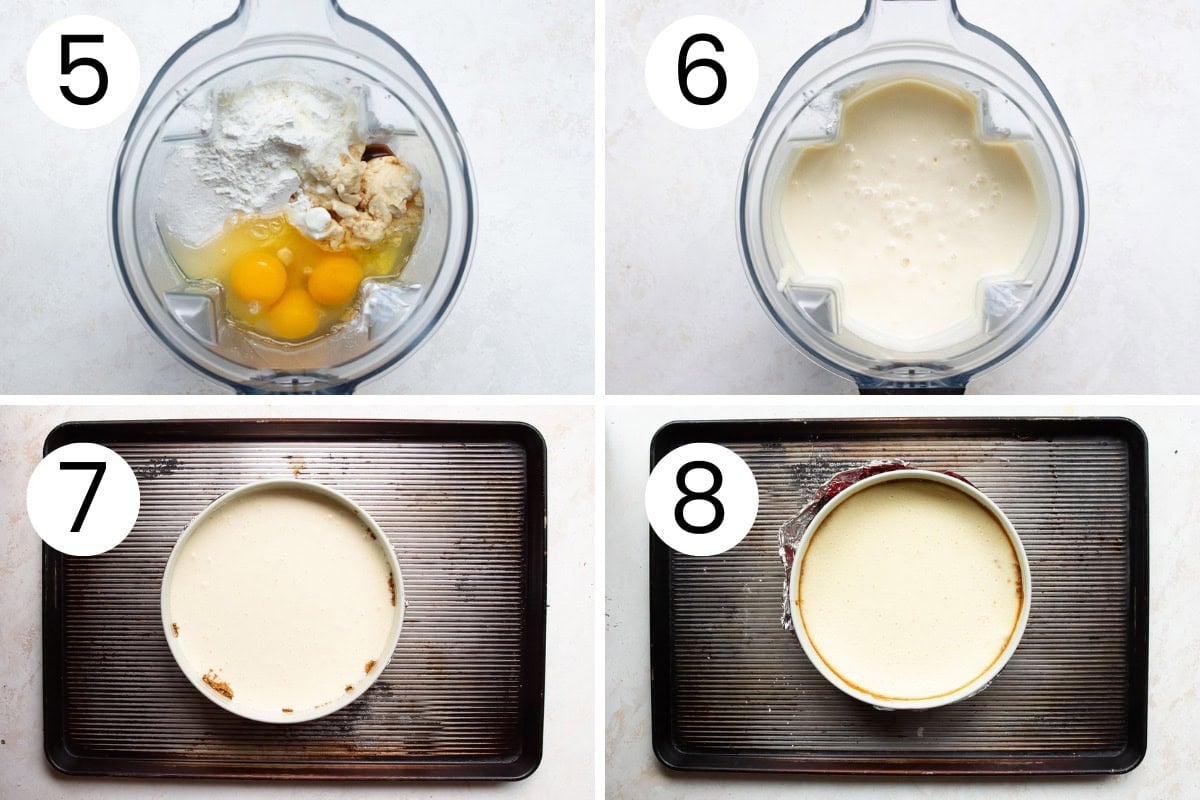
- Make the filling: Blend cottage cheese, Greek yogurt, eggs, sugar, vanilla, and cornstarch in a high speed blender, stopping to scrape the sides as needed.
- Add the filling: Gently pour the filling over the graham cracker crust. Then, place the springform pan in the center of a large baking sheet.
- Add water bath: Boil a kettle of water and carefully pour it into the baking sheet around the springform pan, you want it about 1 inch high on the sides.
- Bake the cheesecake: Bake for 50-60 minutes. When the center jiggles just a bit and the edges are golden brown, it’s ready!
- Cool and chill: Turn off the oven, crack the door open, and let the cheesecake cool in the water bath for an hour. After that, let it cool completely on the counter. Then cover with plastic wrap and set it in the fridge for at least 4 hours, or overnight if you can wait.
- Release and slice: Gently run a knife around the edge to loosen the cheesecake, then remove the rim. Use a sharp knife to cut your slices and enjoy!
Tips for Best Results
Here are a few simple tips to ensure your cheesecake has the perfect taste, texture, and presentation.
- Don’t skip the water bath and oven cooling: The water bath prevents the cheesecake from cooking too quickly or unevenly, which can cause cracks. The slow cooling in the oven lets it set gradually which also reduces the risk of cracks as it cools.
- Don’t over bake: It’ll will keep cooking as it cools so turn off the oven once you see brown edges. A little jiggle when you tap the pan is totally fine.
- The longer you chill, the better: I like overnight. The longer you let it chill, the more the flavors develop and it sets better.
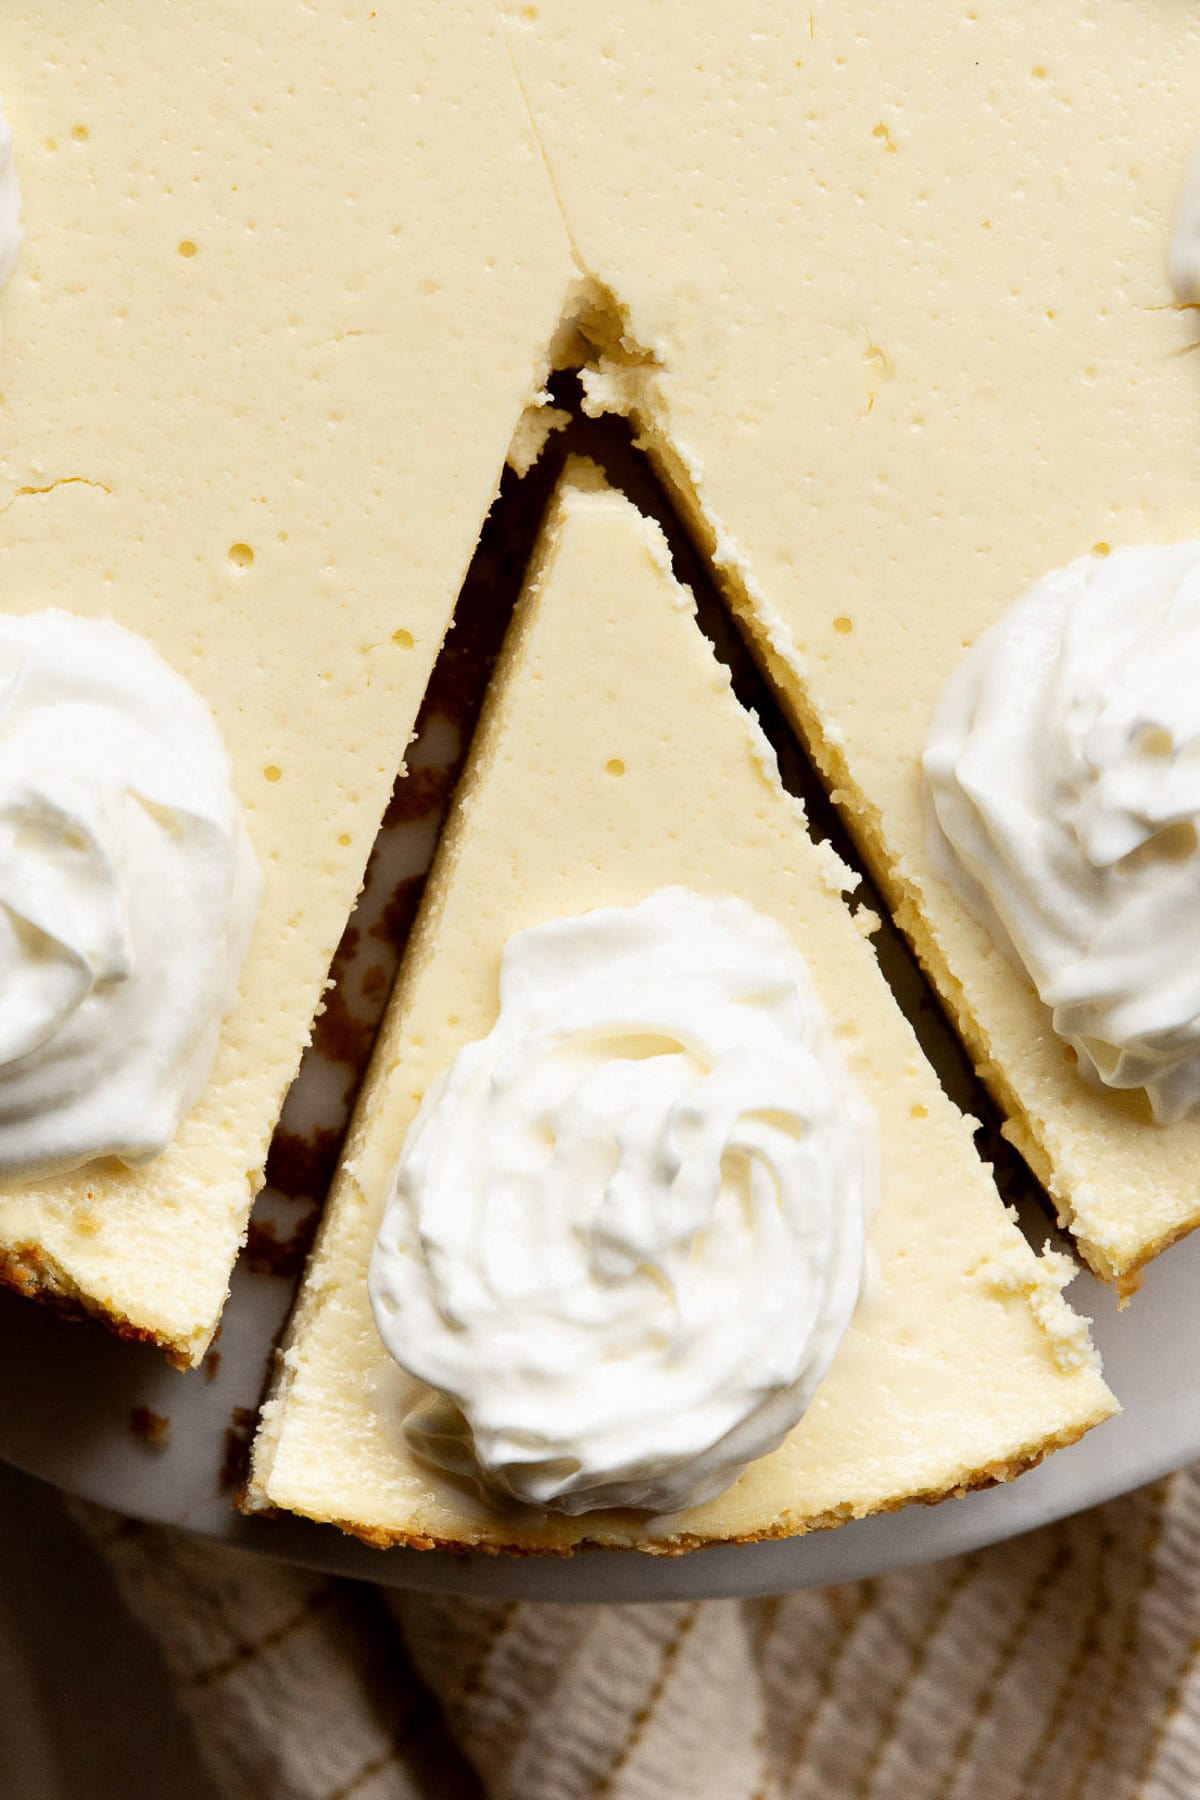
- For clean pretty shape: Line the bottom of the pan with parchment paper, run a knife around the edge after baking, and clean your knife with hot water then wipe clean between slicing each slice.
Variations
- Different crust: Make your crust with nuts like in these healthy strawberry cheesecake bars.
- Omit the crust: You can pour the cheesecake filling right into the pan. Do not skip the lining though because you don’t want it to leak out through the cracks where the bottom meets the sides of the pan.
- Store-bought graham pie crust: This tip saves time since you don’t need to pre-bake it.
- Add lemon flavor: Add the zest of 1 lemon and 2 tablespoons lemon juice in the blender along with all filling ingredients for a nice burst of citrus flavor.
- Add jam: Spoon small dollops of your favorite jam, like raspberry, strawberry, or blueberry jam, onto the top of the cheesecake before baking. Use a toothpick or a knife to gently swirl the jam, bake, and you’ll have a beautiful fruity swirl.
- Toppings ideas: Decorate with fresh berries, sliced kiwi, or peaches. Drizzle on some chocolate or caramel sauce, or a dollop of whipped cream. Try a berry compote or even a sprinkle of crushed nuts, chocolate shavings, or chocolate chips. The possibilities are endless!
How to Store
Store: Keep any leftovers in the cheesecake pan, cover it with plastic wrap or foil, and store in the refrigerator for up to 5 days.
Freeze: You can freeze leftover slices or the whole cottage cheese cake by wrapping the springform pan in plastic and then aluminum foil. Thaw it on the counter for a few hours or in the fridge overnight.
FAQs
I don’t recommend using regular yogurt. You could try to strain it in a cheesecloth overnight in the fridge, but I can’t guarantee the result.
I used 2% for both. It’s best to avoid using low-fat cottage cheese and Greek yogurt together. If you want to lower the fat, you can use one of them at 0% or 1%, but keep in mind the cheesecake will be less creamy and texture might be off.
Some brands of cottage cheese are more watery, next time you can drain it. Also it could happen if you used nonfat or all low fat like 1% cottage cheese and Greek yogurt. Or you accidently overbaked it.
Yes, you can use a pie plate. I’d recommend lining the bottom and spraying the sides well.
More Cheesecake Recipes to Try
More Cottage Cheese Recipes
- Cottage cheese pudding
- Cottage cheese chocolate pudding
- Cottage cheese cookie dough
- Cottage cheese cookies
- Cottage cheese fudge
- Cottage cheese brownies
Cottage Cheese Cheesecake
Ingredients
For the Crust:
- 11 full sheet graham wafers, (1 1/2 cups crumbs or 180 grams)
- 6 tablespoons butter, melted
- 1 tablespoon cane sugar
For the Filling:
- 2 cups cottage cheese, 2% or 4% (16 ounces tub)
- 2 cups plain Greek yogurt, 2% or higher
- 3 large eggs
- 3/4 cup cane sugar
- 1 tablespoon pure vanilla extract
- 2 tablespoons cornstarch
Instructions
Prep:
- Preheat oven to 350 degrees F. Place the bottom of a 9-inch springform pan on top of parchment paper, circle with a pencil, cut out a round and line the bottom of a springform pan with it. Rub the sides inside the form with butter. These steps help with the cheesecake release.
- Wrap the bottom and sides of the pan with 3 layers of heavy duty foil, ensuring there are no rips or holes. Set aside.
To make the crust:
- In a food processor, add graham wafers and process until finely ground. Transfer to a medium bowl, add melted butter and sugar. Mix with spatula until well combined.
- Transfer to previously prepared springform pan, level with spatula and press with a glass into uniform packed layer. Bake for 10 minutes, then remove from the oven and cool off for 10 minutes.
To make the filling:
- In a high speed blender, add cottage cheese, Greek yogurt, eggs, sugar, vanilla extract and cornstarch. Blend until smooth, pausing and scraping the walls.
- Pour filling carefully over pre-baked crust. Place springform pan in the center of a large baking sheet.
To bake the cheesecake:
- Boil a full kettle of water and pour it inside the baking sheet around the springform pan reaching up to 1 inch on the sides of the cake pan.
- Bake cheesecake for 50-60 minutes or until the center of the cheesecake jiggles a bit when you gently tap the pan and edges are brown.
- Turn off the oven and open the door slightly. Let cheesecake sit in the water bath in the oven to cool off for 1 hour.
- Remove cheesecake from the oven and let it cool completely at room temperature. Cover the pan with plastic wrap and refrigerate for at least 4 hours or overnight.
- Run a knife gently around the rim to loosen the chilled cheesecake from the springform pan, then remove the rim. To cut cheesecake, use clean sharp knife. Wipe it clean and dip into warm water for neat slices.
Notes
- Store: Refrigerate leftovers in a cheesecake pan covered with plastic or foil for up to 5 days.
- Freeze: You can freeze leftovers or entire cheesecake by wrapping it inside the springform pan in plastic and then aluminum foil. Thaw on a counter for a few hours or in the fridge overnight.
Nutrition
Nutrition information is automatically calculated, so should only be used as an approximation.


This recipe is delicious. It tastes like cheesecake. Trust the process… it will turn out perfectly. Everyone loved it. Thank you.
So glad to hear everyone loved it! Trusting the process always pays off, cheesecake vibes are a win! Thanks for sharing!