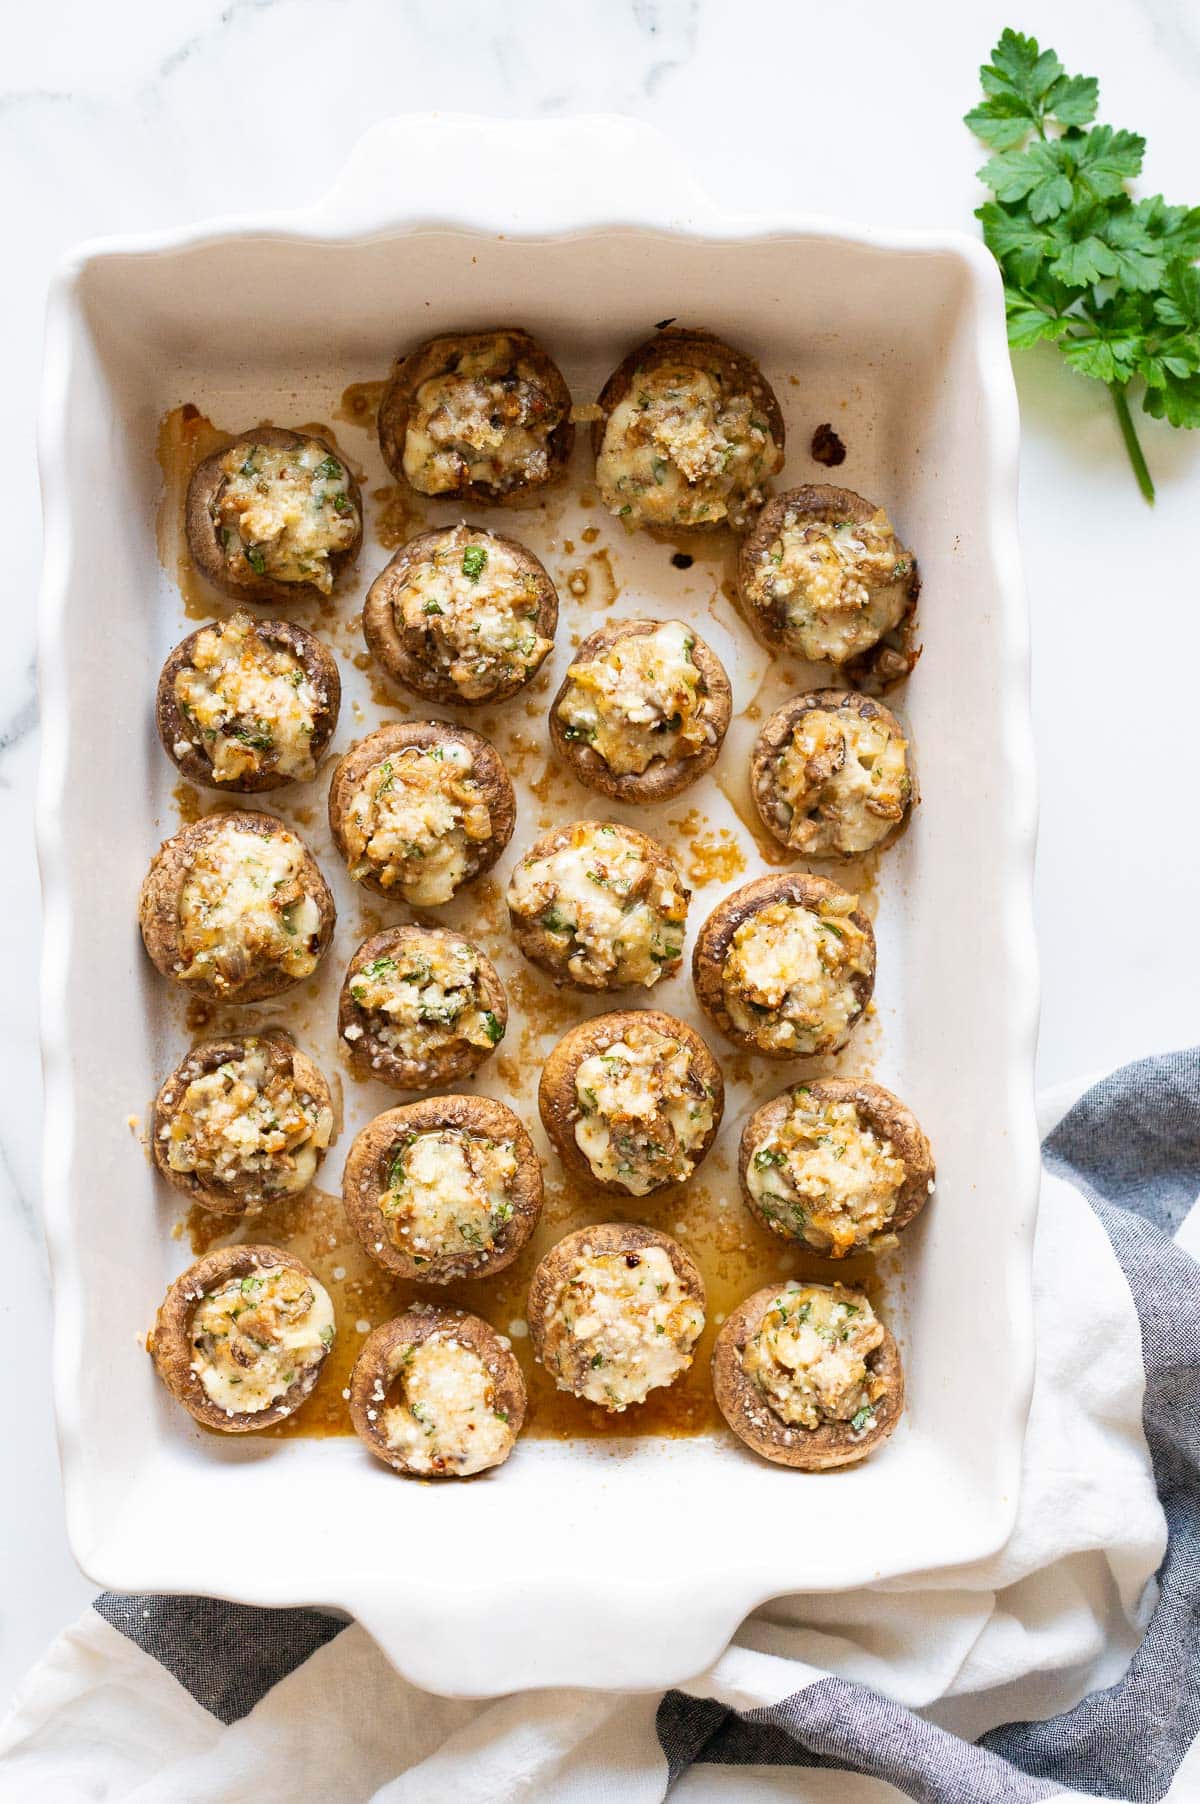
Easy Stuffed Mushrooms filled with a mixture of cheese, garlic and herbs, then baked until golden brown. No bread crumbs or cream cheese! Serve as a delicious appetizer, snack, or side dish!
Short on time? We also love these 2 ingredient parmesan mushrooms.
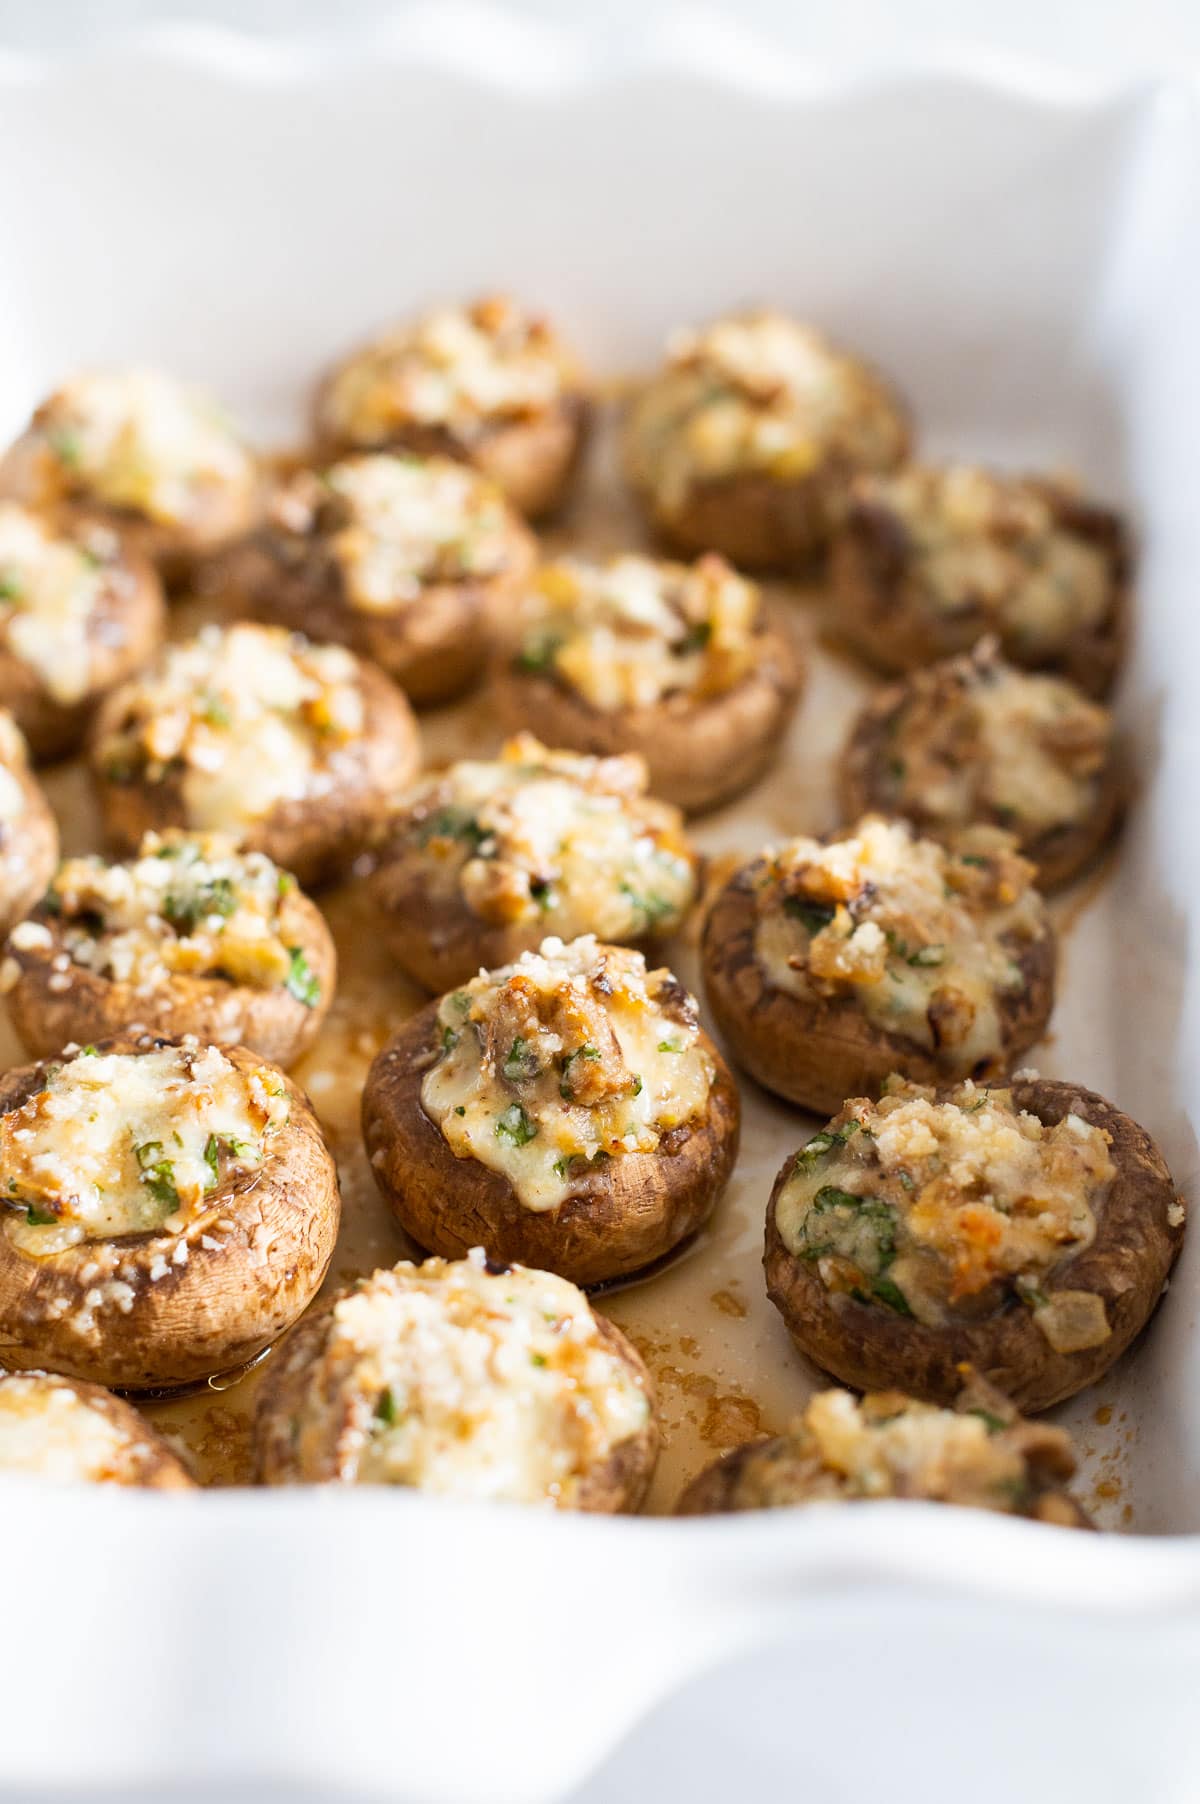
Table of Contents
- Why You’ll Love This Recipe
- Ingredients for Stuffed Mushrooms
- How to Make Stuffed Mushrooms
- What Mushrooms to Use for Stuffed Mushrooms?
- How to Clean Mushrooms
- Tips for Best Results
- Can I Make Them Ahead?
- How to Store and Reheat
- FAQs
- More Mushroom Recipes to Try
- More Stuffed Recipes
- Stuffed Mushrooms Recipe Recipe
I have been including stuffed mushrooms on my menu for Thanksgiving or Christmas dinner side dish, potlucks, and parties for years and they always disappear fast with everyone begging for the recipe.
We like these bite-sized treats warm or cold, as an appetizer or side dish, and they make the tastiest leftovers!
Why You’ll Love This Recipe
- Crowd pleaser: Everyone loves stuffed mushrooms. They’re always a huge hit!
- Can be made ahead: Meal prep is a must this time of year, every extra minute counts. Make these mushroom caps 1-2 days before and bake just before serving.
- Easy recipe: Simple ingredients, saute, mix, stuff and bake.
- Healthier: I make them without cream cheese or bread crumbs.
- Travels well: Cover baked dish with plastic wrap, take to your next gathering and don’t worry about losing taste or shape.
Ingredients for Stuffed Mushrooms
You’ll be combining simple, everyday ingredients to make this stuffed mushrooms recipe.
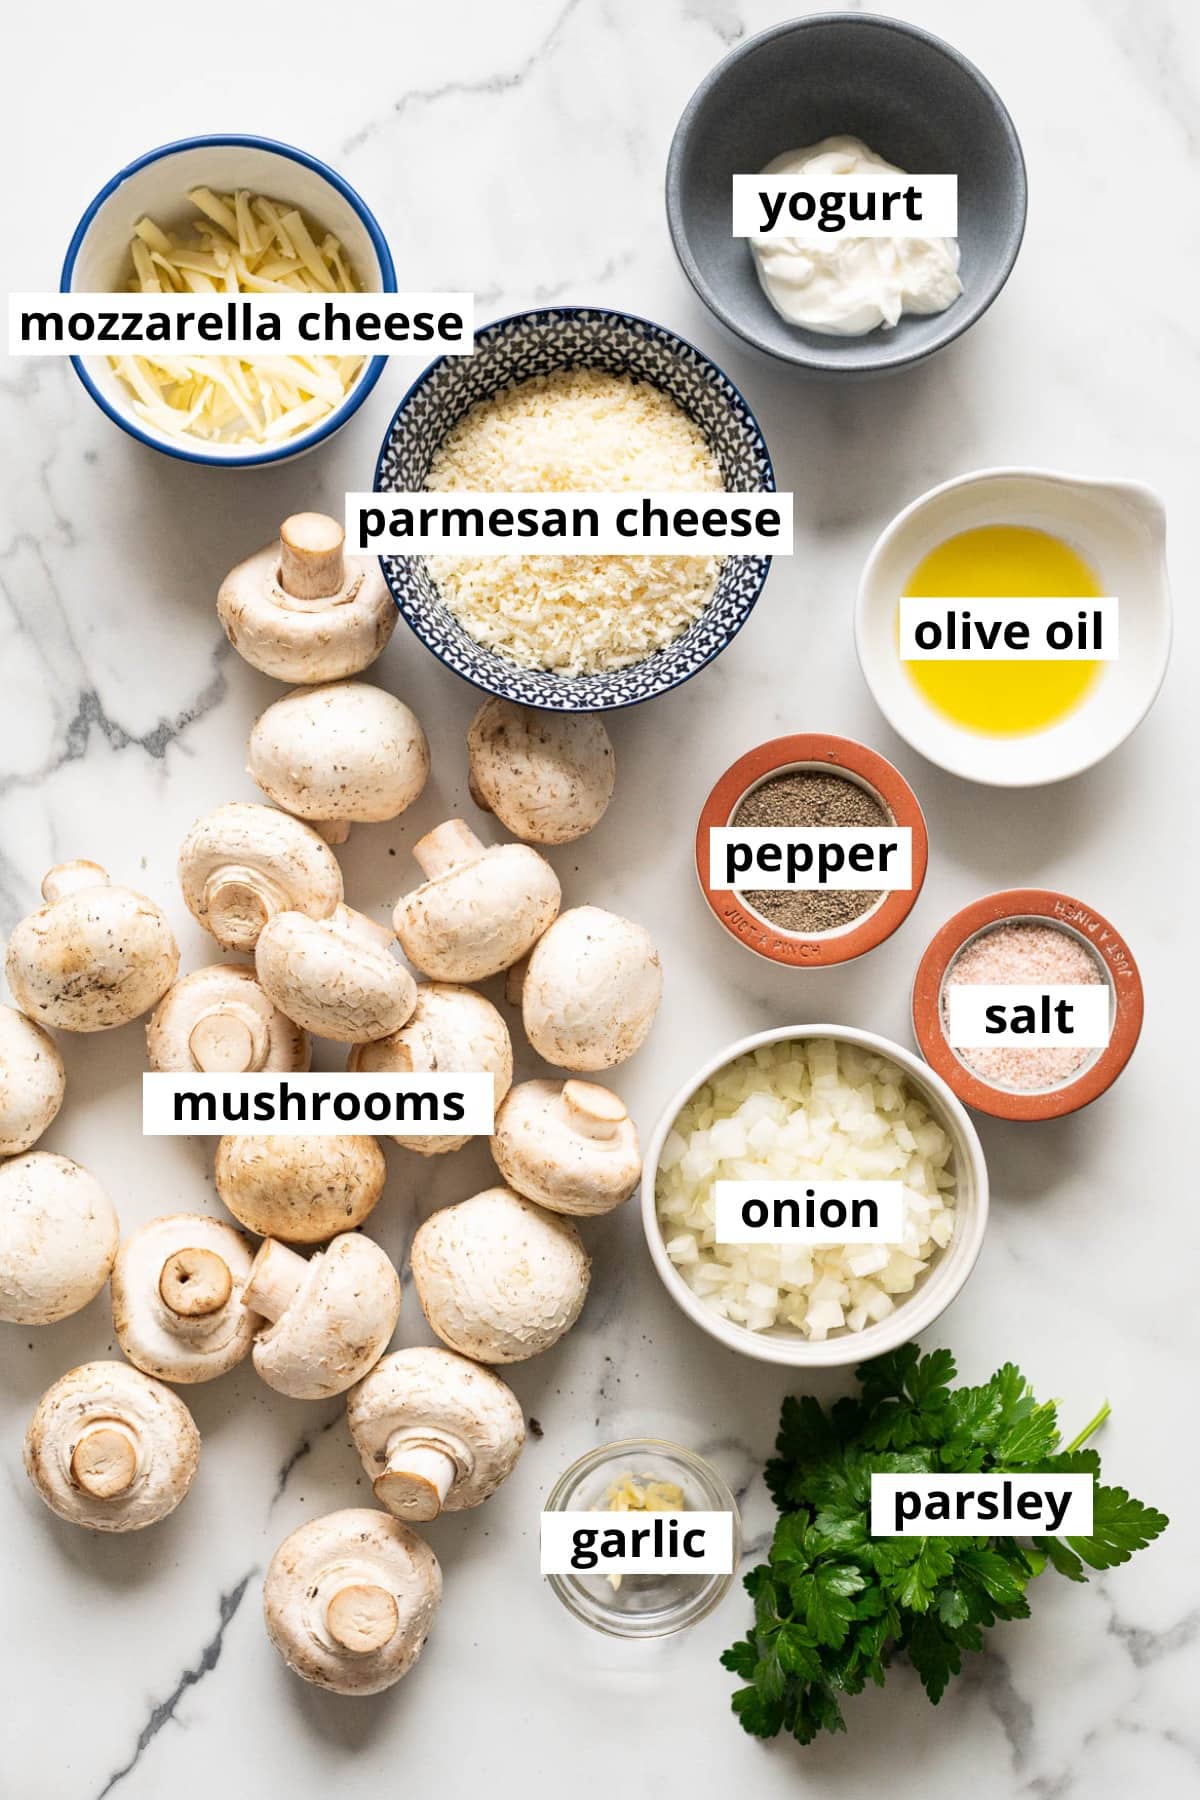
- Mushrooms: It is important to choose fresh and firm white or brown mushrooms. This recipe requires 20 medium to large mushrooms.
- Onion and garlic: These aromatics add flavor and texture to the filling.
- Fresh herbs: I love the peppery taste of fresh parsley, not to mention the pop of color. Feel free to swap with basil or oregano.
- Cheese: A mixture of Parmesan cheese and mozzarella cheese add layers of flavor. Use freshly grated cheese to avoid anti-caking agents that prevent it from melting, plus fresh always tastes better.
- Yogurt: Plain Greek yogurt creates a healthier creamy filling with added protein and a nice tangy taste.
- Spices: Salt and pepper to taste.
- Oil: Extra virgin olive oil works well here for its aroma, taste, and health benefits. It also helps brown the mushrooms.
How to Make Stuffed Mushrooms
Here’s a quick overview of how to make stuffed mushrooms. Whip up the filling, stuff the mushrooms, and bake. I love how simple it is!
You can find a full recipe card below.
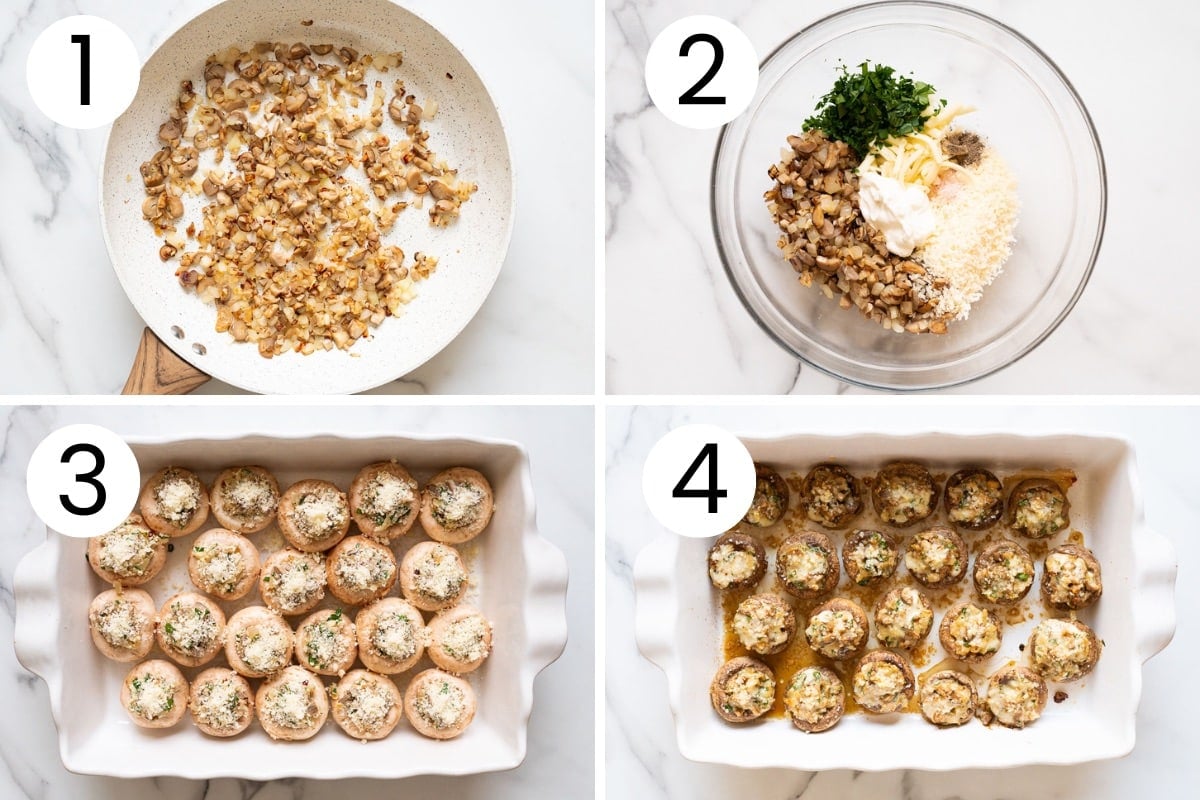
- Prep: Start by preheating your oven to 400 F. Meanwhile, wipe down the mushrooms with a damp paper towel, pull out the stems, chop them up and set aside. Place mushroom caps cavity side up in a baking dish.
- Saute aromatics: Heat a medium skillet on medium heat and coat with oil. Saute onion, garlic, and chopped mushroom stems with a pinch of salt for 5 minutes.
- Make stuffed mushroom filling: Transfer the mushroom onion mixture to a bowl along with parsley, 1/2 cup Parmesan cheese, mozzarella cheese, yogurt, salt and pepper. Stir with spatula to combine.
- Stuff mushroom caps: Fill each mushroom cap with stuffing, sprinkle more Parmesan cheese on top, and season with salt.
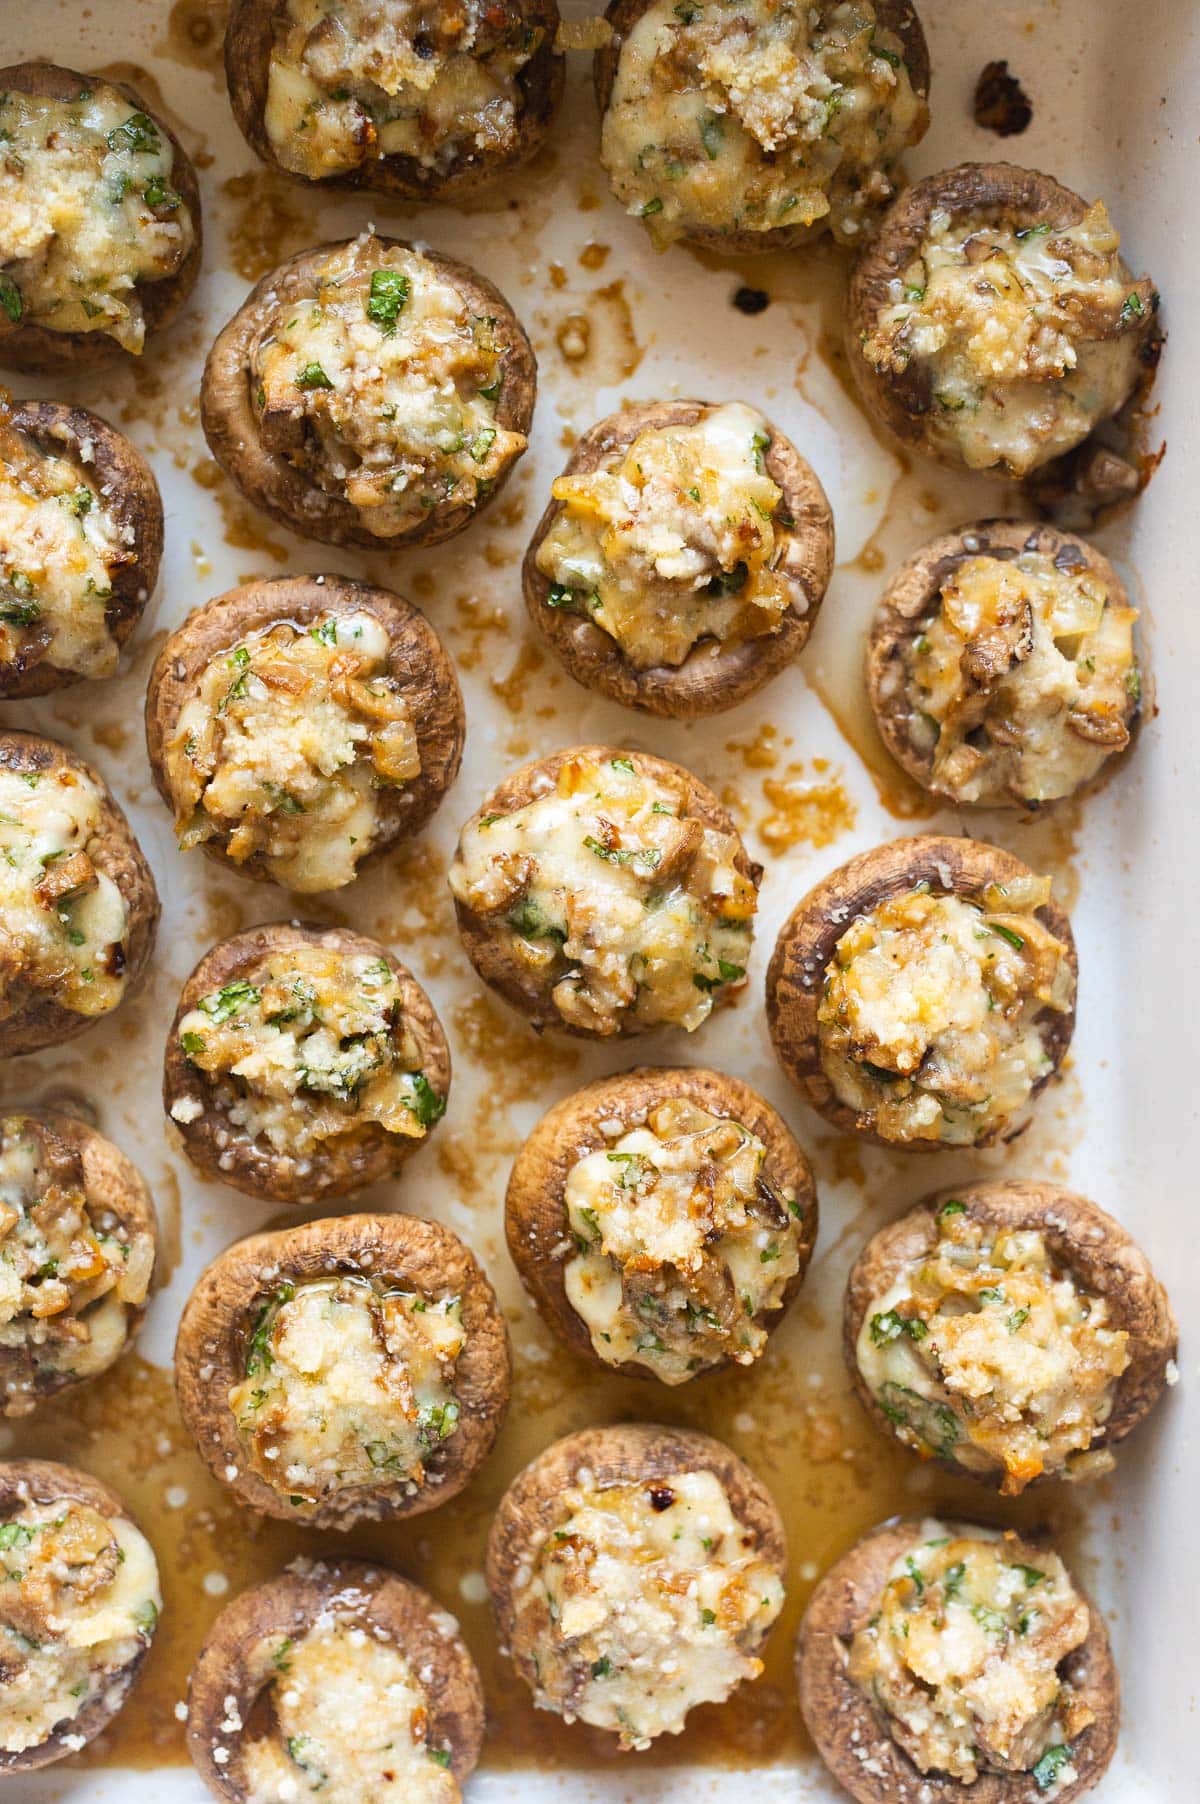
- Bake: Set baking dish in the oven and bake for 20 minutes until golden. Serve hot or cold.
What Mushrooms to Use for Stuffed Mushrooms?
The best mushrooms to use for stuffing are brown mushrooms because they will have more flavor. I recommend baby bella mushrooms, cremini mushrooms or baby portobello mushrooms.
I don’t mind white mushrooms, if that’s what you have on hand you can still make this tasty appetizer! My grocery store carried only them this time and that’s what I am using today!
How to Clean Mushrooms
When cleaning mushrooms for stuffed mushrooms, it’s important not to rinse mushrooms under cold water. They are porous and will absorb water.
Instead, wipe each mushroom clean using a damp paper towel. This will remove any dirt and debris without soaking up water.
Tips for Best Results
Follow these simple tips and each mushroom bite will be packed with flavor.
- Don’t soak mushrooms: Mushrooms will absorb water like a sponge resulting in a soggy texture.
- Don’t add too much filling: Medium to large sized mushrooms are easier to stuff but they will shrink in the oven.
- Finely chop the ingredients: Chop stems, onions, herbs, and garlic into small pieces and grate cheese on the medium or fine grate side of a box grater so everything is evenly incorporated once mixed.
- Season the mushrooms: That last dusting of salt really enhances the flavor. If you’d like, you could also drizzle each cap with olive oil before adding the stuffing.
Can I Make Them Ahead?
Yes. There are two easy options for making these savory appetizers ahead of time.
- Prepare mushrooms and stuffing, refrigerate separately for up to 48 hours, then fill and bake just before serving.
- Assemble stuffed mushrooms as per recipe and refrigerate for up to 12 hours, bake when ready.
With any option, I recommend baking a few minutes extra because mushrooms will be chilled.
How to Store and Reheat
Store: Refrigerate any leftovers in an airtight container for up to 2 days.
Mushrooms generally don’t hold up well in the freezer, so I do not freeze them.
Reheat: Heat your stuffed mushrooms in the microwave or oven at 350 F for 10 minutes. Also air fryer works very well!
FAQs
To avoid mushrooms from getting soggy, do not soak or rinse mushrooms under water.
Yes and no. Gently wipe the surface clean with damp paper towels to remove dirt and debris, but do not rinse or soak.
Mushrooms are best cooked at a high temperature for a shorter time. Cook mushrooms at 400 degrees F for 20-25 minutes until golden brown.
More Mushroom Recipes to Try
- Healthy mushroom stroganoff
- Chicken and mushrooms
- Bean and mushroom soup
- Broccoli mushroom stir fry
- Lentil casserole with mushrooms
More Stuffed Recipes
- Stuffed dates
- Cream cheese stuffed mini peppers
- Spinach stuffed chicken breast
- Cranberry and brie stuffed chicken breast
Stuffed Mushrooms Recipe
Equipment
Ingredients
- 20 medium-large mushrooms white or brown
- 1 medium onion finely chopped
- 2 garlic cloves minced
- 3 tablespoons parsley finely chopped
- 3/4 cup Parmesan cheese grated & divided
- 1/4 cup mozzarella cheese grated
- 2 tablespoons yogurt plain
- 1/2 teaspoon salt divided
- 1/4 teaspoon ground black pepper
- 1 tablespoon olive oil extra virgin
Instructions
- Preheat oven to 400 degrees F. With a damp paper towel, wipe down the mushrooms. Pull out the stems and finely chop them. Set aside. Place mushroom caps on prepared baking sheet.
- Preheat medium skillet on medium-high heat and swirl olive oil to coat. Add onion, garlic, mushroom stems and a pinch of salt. Saute for 5 minutes, stirring occasionally.
- Transfer to a medium bowl along with parsley, 1/2 cup Parmesan cheese, mozzarella cheese, yogurt, 1/4 teaspoon salt and pepper. Stir with spatula to combine.
- Using a teaspoon, fill the mushroom caps with stuffing. Place a bit of remaining 1/4 cup Parmesan cheese on top of each mushroom and sprinkle all of them with more salt. Bake for 20 minutes.
- Serve hot or cold. I like them both ways.
Notes
- Store: Refrigerate in an airtight container for up to 2 days. Do not freeze.
- Make ahead: Can be prepared up to 48 hours in advance. Refrigerate mushroom caps and stuffing separately, then fill and bake just before serving. Or you can refrigerate assembled stuffed mushrooms for up to 12 hours and bake before serving. I recommend to add a few minutes to baking time because mushrooms will be chilled.


My husband actually asked …. “you made these?!?” before devouring seconds. They were pretty darn good. I use recipes as a inspiration rather than an exact science. So, I did substitute Swiss cheese because it was what I had on hand and added an egg to get the mixture to stick together a bit while baking. These will be on regular rotation in our house from now on .
That is so awesome to hear Julie 🙂
Great recipe, did them on the bbq and it turned out perfect
Awesome Jim! Thanks for sharing!