This 4 ingredient Healthy Chocolate Frosting is rich, creamy and chocolate-y frosting that’s naturally dairy-free and nut-free. It holds up beautifully on cakes, cupcakes and brownies.
Why You’ll Love This Frosting

I just published this new mind blowing healthy chocolate zucchini cake and used this healthy chocolate frosting. You would never know it’s better for you, my teenage boys gobbled it all up!
It’s spectacular 4 ingredient frosting you can spread on anything! No corn syrup, no shortening or butter, no powdered sugar. It simply relies on the sweetness of the chocolate.
The type of chocolate you use easily adjusts this healthy chocolate frosting recipe to your dietary needs. It’s also naturally dairy-free and nut-free! The biggest tip – use smooth coconut milk from a can and you won’t have any issues! Read tips on that below and let’s make it!
Reader’s Review
Dairy free chocolate delight! Loved this easy frosting, we licked the bowl clean after icing cake!
Lynda
Ingredients for Healthy Chocolate Frosting
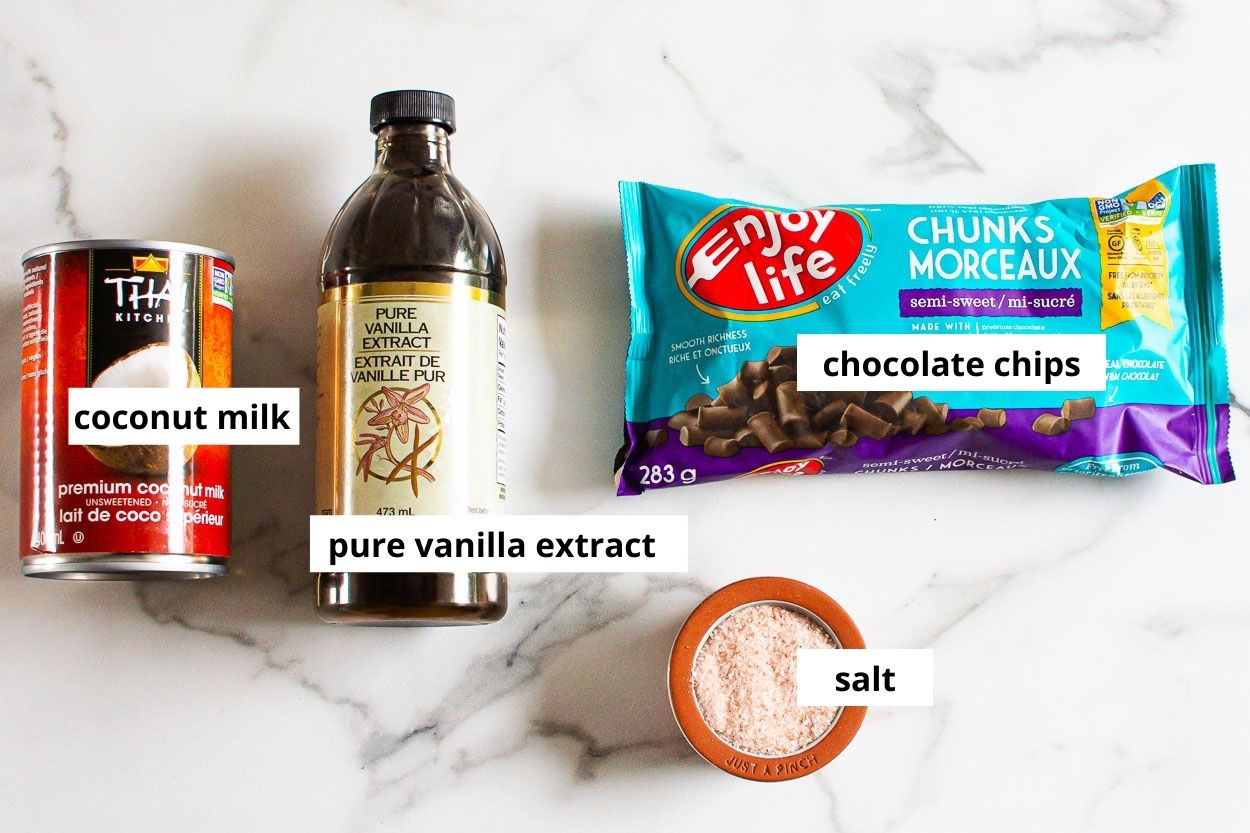
- Coconut milk: You’ll need a 15 ounces can of smooth and not grainy full fat coconut milk like pictured above! Not coconut cream, light coconut milk or coconut milk from a carton. My go-to is Thai kitchen.
- Chocolate: Use high quality real (with cocoa butter) chocolate chips, chunks, or bars. For a sugar free healthy chocolate frosting, use sugar free chocolate like
Lily’s chocolate chips. - Vanilla extract: I like pure vanilla extract for the best flavor, not imitation one.
- Salt: A pinch of salt will contribute to the rich chocolate flavor.
Additions
- Extracts: Natural extracts are the quickest and easiest way to add extra flavor. Add to taste some almond, peppermint or orange extract.
- Coffee: A small amount of espresso powder or instant coffee will enhance the depth of the chocolate flavor. Increase the amount for a mocha frosting.
- Seed or nut butter: Adding a few spoonfuls of almond butter, peanut butter or tahini will add flavor, protein, and more heart-healthy fats.
How to Make Healthy Chocolate Frosting

- Warm up coconut milk: Transfer the entire can of coconut milk (cream and watery liquid) to a medium saucepan and heat it over medium heat just until before boiling, whisking to combine. Then remove from heat.
- Add the chocolate: Add chocolate chips, vanilla and salt. Whisk until smooth, it will be runny.
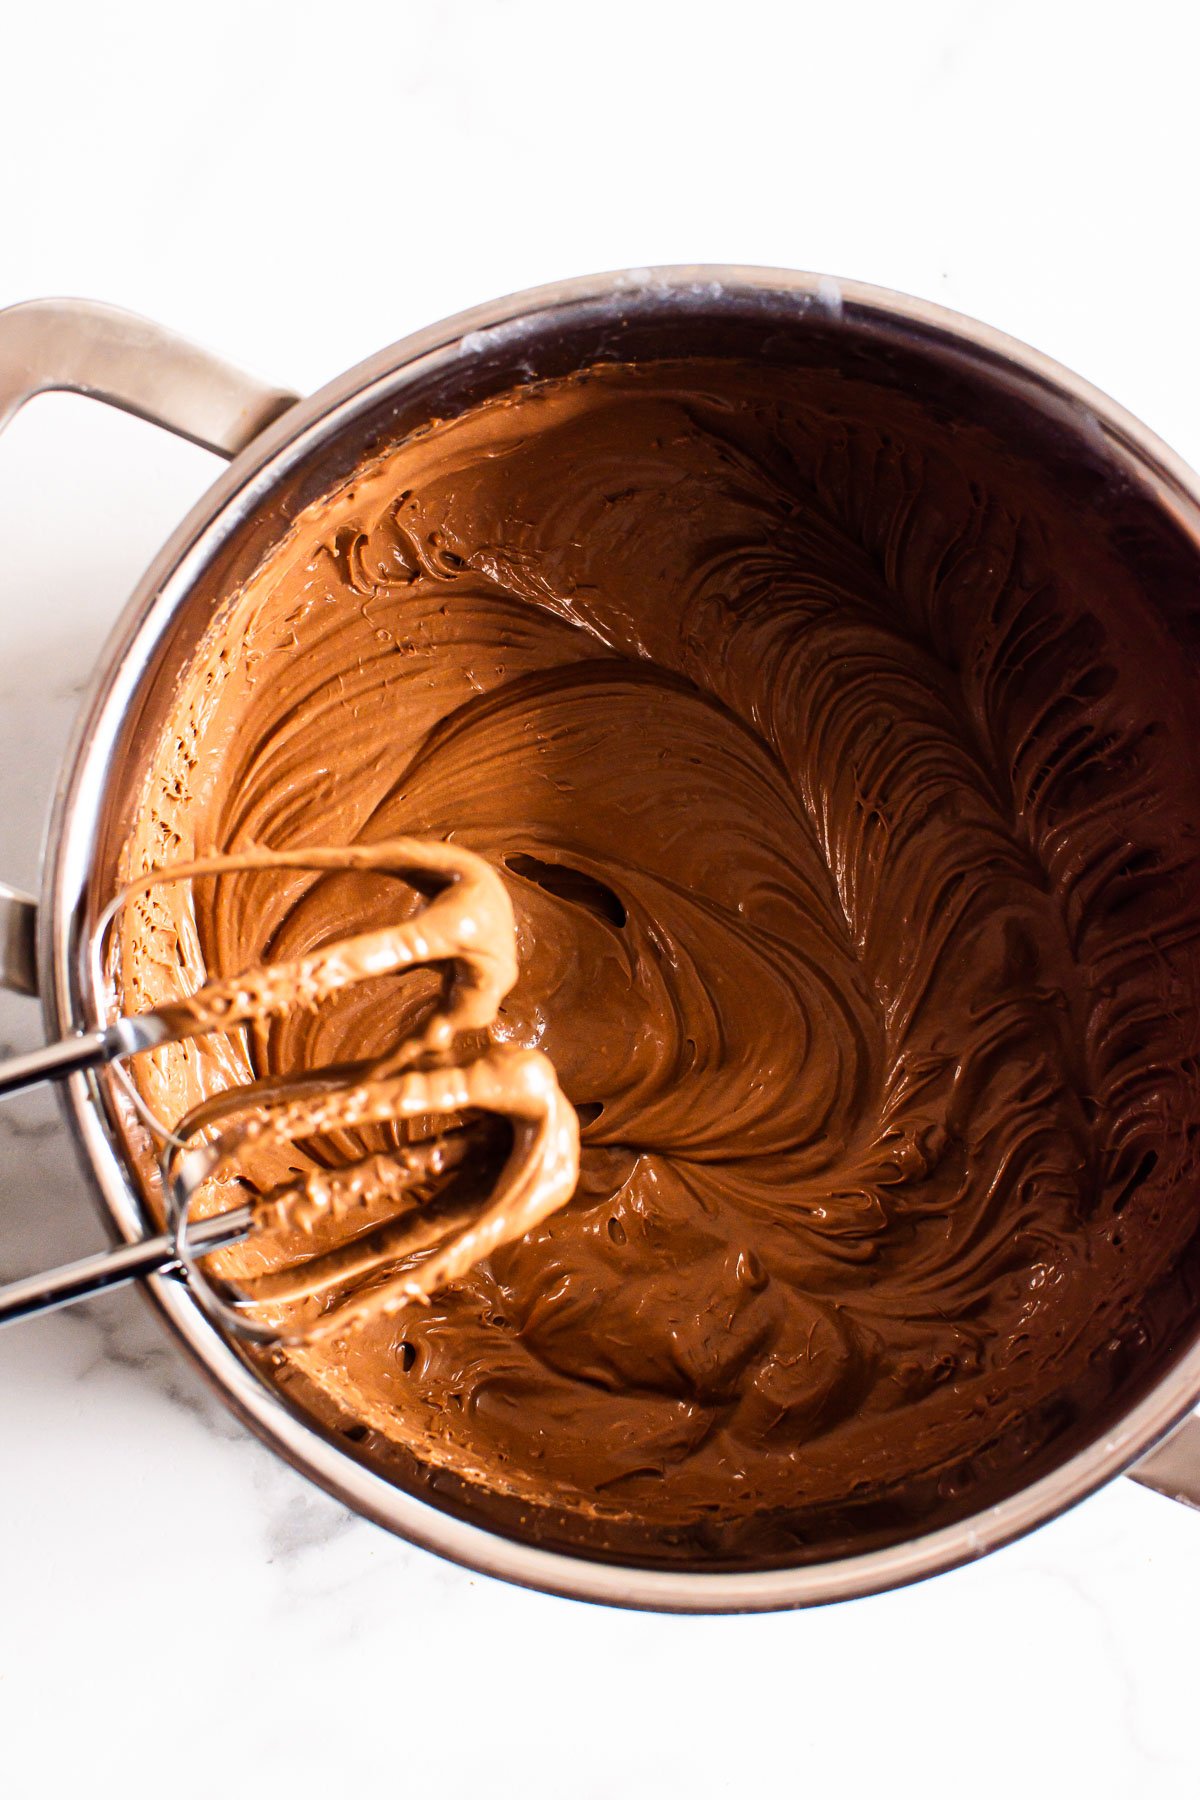
- Chill it: Transfer pot to the fridge to chill for 4 hours or until solid. It’s ready when you press with a your finger on top and there is a dent, Nutella consistency.
- Whip it: Using an electric hand mixer or a stand mixer, whip the frosting just for 1-2 minutes, just until fluffy. Be careful not to overwork it or chocolate may start to melt again.
Tips for Best Results
- Use quality coconut milk: The one that’s smooth and not gritty. My favorite brand is Thai kitchen but I also use Compliments and Rooster brands (Canada).
- Separation is normal: Canned coconut milk separates into a solid coconut cream and water during colder months. It’s normal, use both.
- Don’t use coconut cream: We use the entire can of coconut milk which consists of coconut cream and water. I think using coconut cream in its place will throw off the entire consistency.
- Do not over whip the frosting: Whip just for 1-2 minutes or until fluffy. It won’t get much lighter. if you whip it for longer, chocolate will start to melt again. If that happened, place it back in the fridge for a few hours.
- To avoid runny frosting: Be sure to use coconut milk from a can, not a carton. Chill it for 4 hours. And whip just for 1-2 minutes.
- To fix runny frosting: You can either heat it once more and add more chocolate or some coconut oil, then chill for 4 hours again. Both ingredients solidify when chilled.

Using the Chocolate Frosting
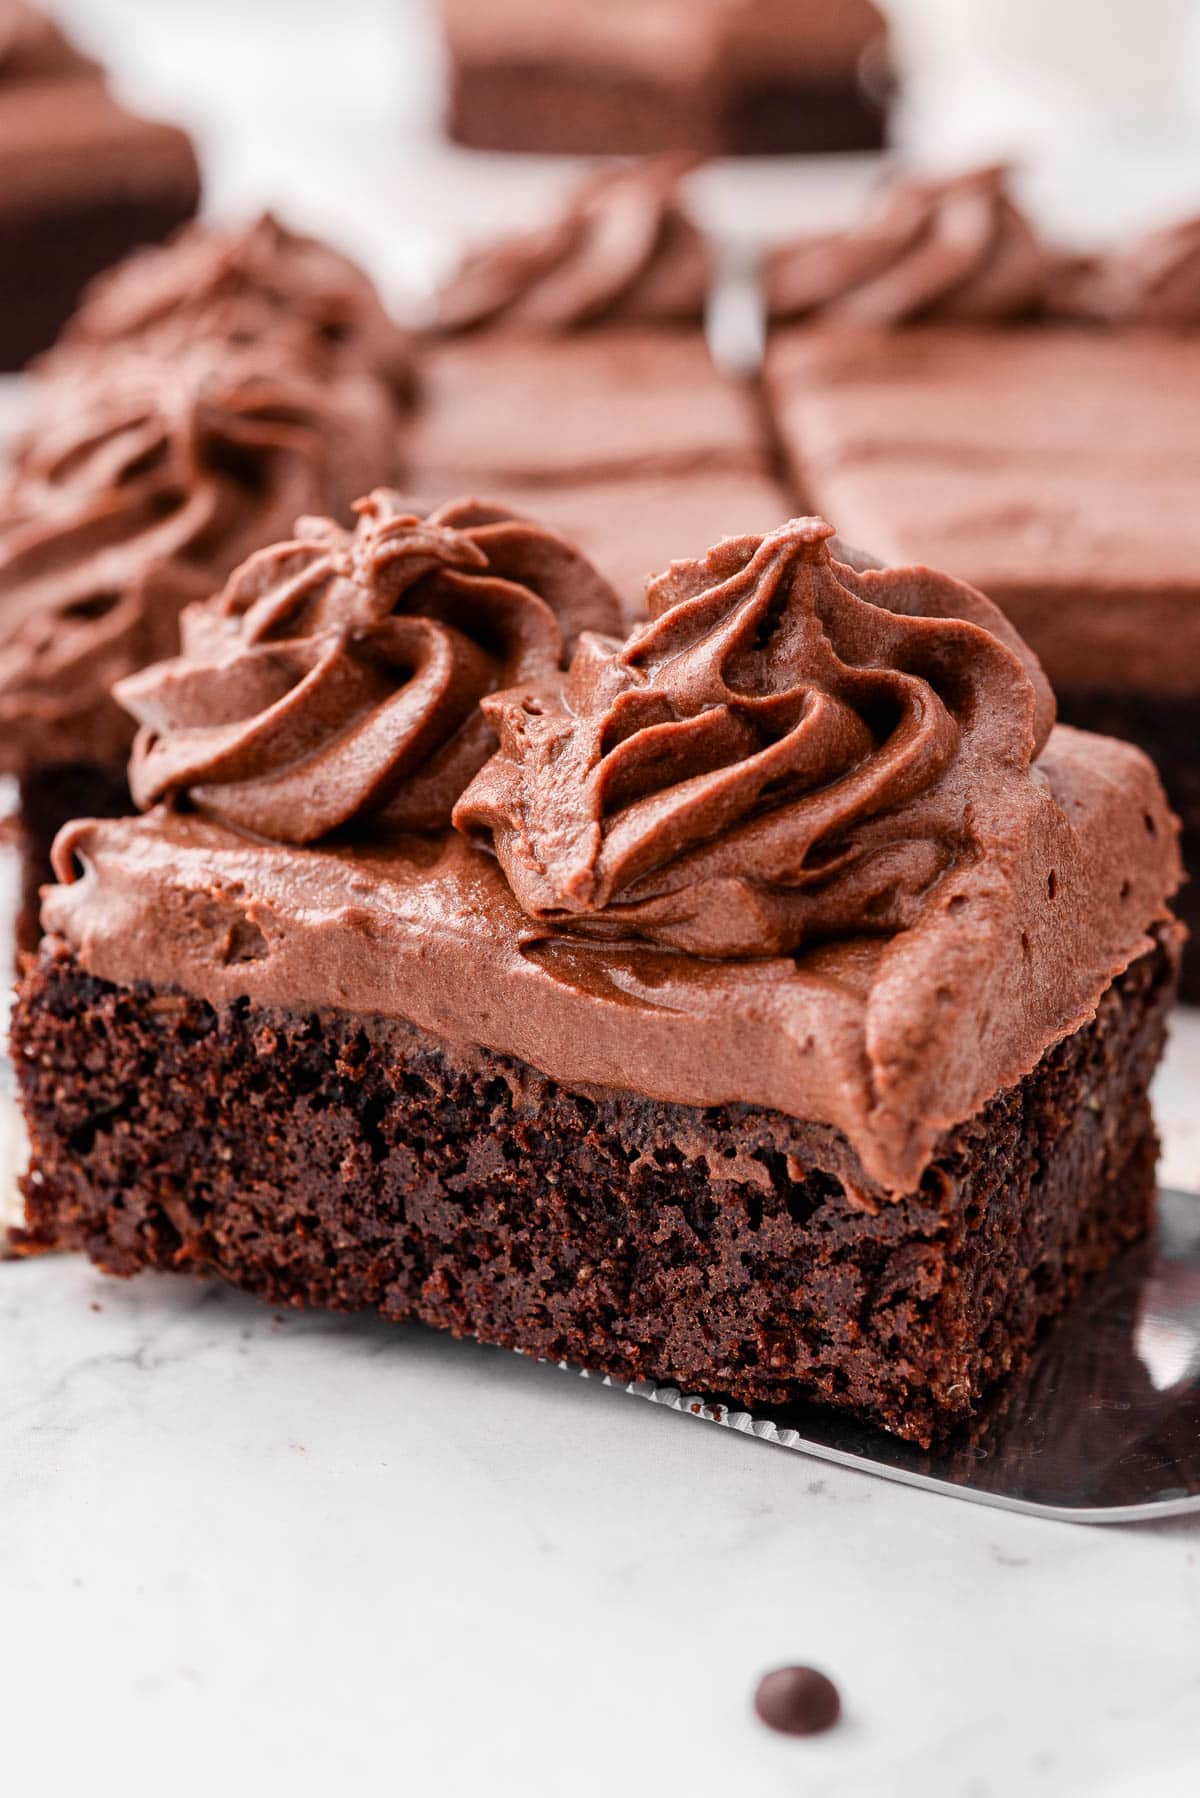
- Uses: Use for spreading between the layers and on top of cakes, for dipping, and piping on top of cupcakes and cakes.
- Yield: This chocolate frosting recipe makes enough to frost 12 cupcakes generously with tall swirls, 24 cupcakes spread on with a knife, or a 2-3 layer 8-9-inch healthy chocolate cake.
- If spreading: You can use it immediately after whipping. However, make sure baked goods are completely cool.
- If piping: After whipping with a mixer, refrigerate icing for a few more hours before attempting to pipe. You have to whip it first otherwise it will be harder to pipe and have a dense, ganache like consistency rather than fluffy, like a typical buttercream frosting.
Serving Tip
This chocolate frosting is sturdy enough to sit out at room temperature for 2 hours, but as with most frostings, it will melt if left for too long.
How to Store
Store: Once prepared, you can store the icing for up to 2 days before using it. The frosted goods can then be stored for an additional 3-4 days.
Freeze: Transfer to an airtight freezer-safe container and store for up to 3 months. Allow it to thaw in the refrigerator overnight before using it.
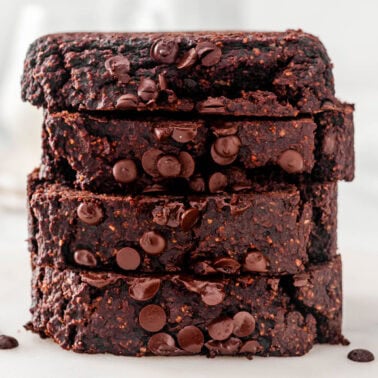
More Healthy Frosting Recipes
- Greek yogurt frosting
- Cottage cheese frosting
- Healthy buttercream frosting
- Healthy cream cheese frosting

Healthy Chocolate Frosting
Equipment
Video
Ingredients
- 14 ounces can coconut milk, full fat (not coconut cream)*
- 2 cups chocolate chips, 10 ounces bag
- 1 teaspoon pure vanilla extract
- Pinch salt
Instructions
- In a medium pot, add entire can of coconut milk (cream and clear liquid) and cook on medium heat until warm, just until it starts to boil but not boiling.
- Remove from the heat, add chocolate chips, vanilla and salt. Whisk until smooth – it will be runny.
- Refrigerate in the pot for 4 hours or until solid. Frosting is ready to be whipped when there is a dent when touched with a finger.
- Using an electric mixer, whip it just until fluffy, 1-2 minutes. Don't whip for too long because frosting will start to thin out.
- If spreading, use frosting immediately. Make sure baked goods are completely cooled first. If piping, let frosting refrigerate for a few hours first.
Notes
- *Coconut milk: You’ll need a 15 ounces can of smooth and not grainy full fat coconut milk! Not coconut cream, light coconut milk or coconut milk from a carton. No other milk works either, sorry!
- Store: Refrigerate the frosting until ready to assemble the cake or cupcakes for up to 2 days. Refrigerate frosted baked goods for up to 3-4 days.
- Freeze: Freeze frosting in an airtight container or up to 3 months. Thaw in the fridge overnight.
- The yield: This can frost 12 cupcakes generously with tall swirls, 24 cupcakes spread on with a knife, or a two-three layer 8-9″ chocolate cake.
Nutrition
Nutrition information is automatically calculated, so should only be used as an approximation.


Very tasty. My frosting stayed quite runny. More like a sauce. Anything to thicken it up? Will make again. Love the taste.
I just made this frosting yesterday and didn’t have any issues. What brand of coconut milk did you use? Did you let it refrigerate for at least 4 hours? Was milk from a can? Thai kitchen brand or even rooster one from superstore work great. I would stick in the fridge overnight and see if it helps. I’m not sure of other way to thicken it…
if you add coffee, how much?
Just add and taste.
As healthy as chocolate frosting gets. Delicious and great texture..
Very true! So happy to hear you enjoyed the recipe!
Dairy free chocolate delight! Loved this easy frosting, we licked the bowl clean after icing cake!
So glad you enjoyed it down to every last lick of the bowl! 🙂