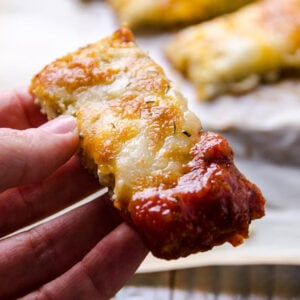
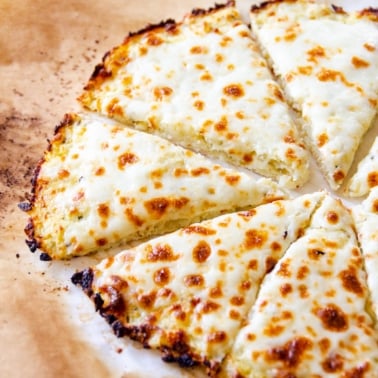
These Cauliflower Breadsticks are cheesy, won’t crumble when held, and are a delicious low-carb, gluten-free, Keto-friendly, low-calorie breadstick alternative. If anything, this cauliflower cheese bread is MORE decadent with bubbly cheesy and a ‘pizza’-esque taste, and yet a single portion contains just 29 calories and 2g net carbs!
Looking for more ways to swap out carbs using cauliflower? Why not check out this creamy cauliflower mashed potatoes, cauliflower potato salad, and all sorts of cauliflower recipes!
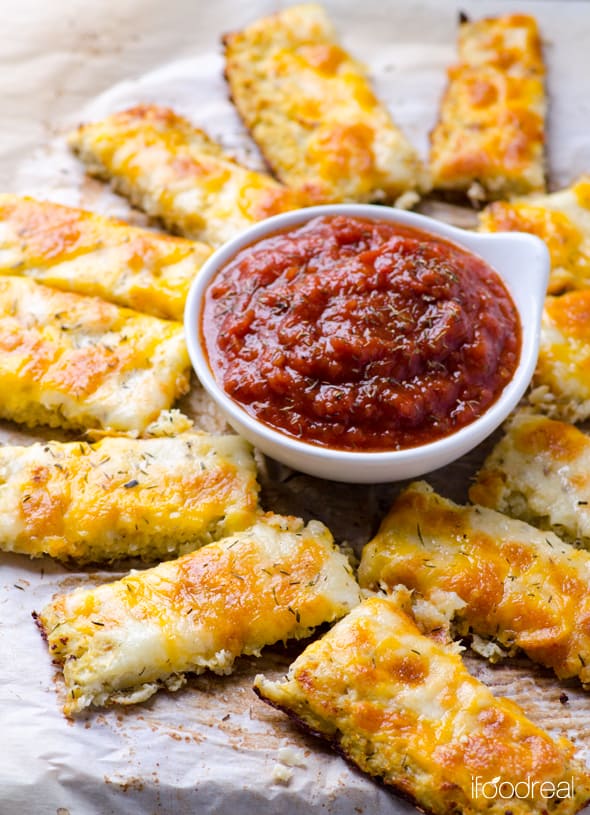
Table of Contents
In the last few years, I have jumped into the cauliflower rice trend. However, after sharing this list of 25 cauliflower rice recipes, I started looking for even more ways to enjoy this versatile ingredient.
After a couple of years of transforming cauliflower rice into cauliflower pizza crust, I realized that it would also make for the most delicious (and low-carb, yay!) cauliflower breadsticks, which is how this cauliflower sticks recipe was born!
Not only are these cauliflower cheese breadsticks gluten-free, grain-free, and low-carb, but they’re still wonderfully cheesy, flavorful, and super simple to prepare. While the process is a little time-consuming, I won’t lie the results are so worth it. I even make double batches now so that I can freeze one for healthy sides later!
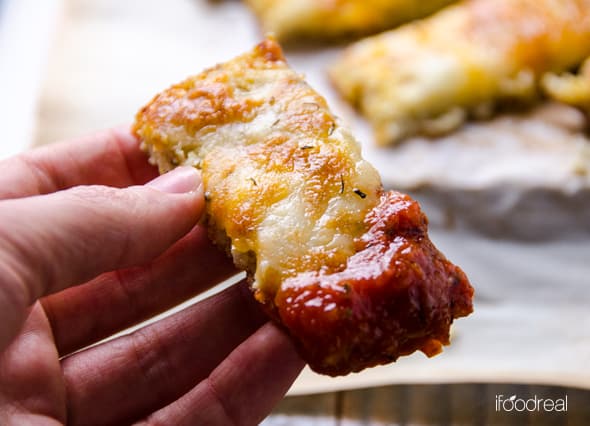
When following my steps, you’ll be enjoying cauliflower sticks that can be hand-held (no flopping/ crumbling apart) and tastes amazing served warm with tangy marinara sauce. You can also make these cauliflower breadsticks even lighter by omitting the cheesy topping! However, at just 39 cal per serving, you honestly don’t even need to!
I love serving up these low-carb cauliflower sticks at gatherings and parties when you know you’re going to overeat. Because even 3-4 (or even 5) of these are still reasonably low calorie, fat, and carbs in relation to most ‘party snacks. That way, you can enjoy the evening, get your fill, and not feel guilty afterward!
This keto breadsticks recipe even doubles up as a pizza base. Interested in more alternative pizza bases? You might like this sweet potato pizza crust or oatmeal pizza crust!
Why This Cauliflower Bread Recipe Works?
- These cauliflower breadsticks are made with just a handful of simple ingredients!
- These cauliflower sticks can also be hand-held with no worries of them falling apart (which isn’t the case for every recipe!)
- A single serving contains just 39kcal and 2g net carbs – making for a great appetizer or snack!
- This recipe is incredibly budget-friendly, relying on a single cauliflower, eggs, cheese, and a handful of seasonings!
- Cauliflower cheese breadsticks are a great way to encourage your kids to eat more veggies, too! In my house, these are definitely child-approved!
- This keto breadstick recipe is also grain-free, gluten-free, low-carb, and low-calorie!
- Not to mention that in the years since this recipe was posted, it’s received dozens of rave reviews!
Low Carb Cauliflower Sticks Ingredients
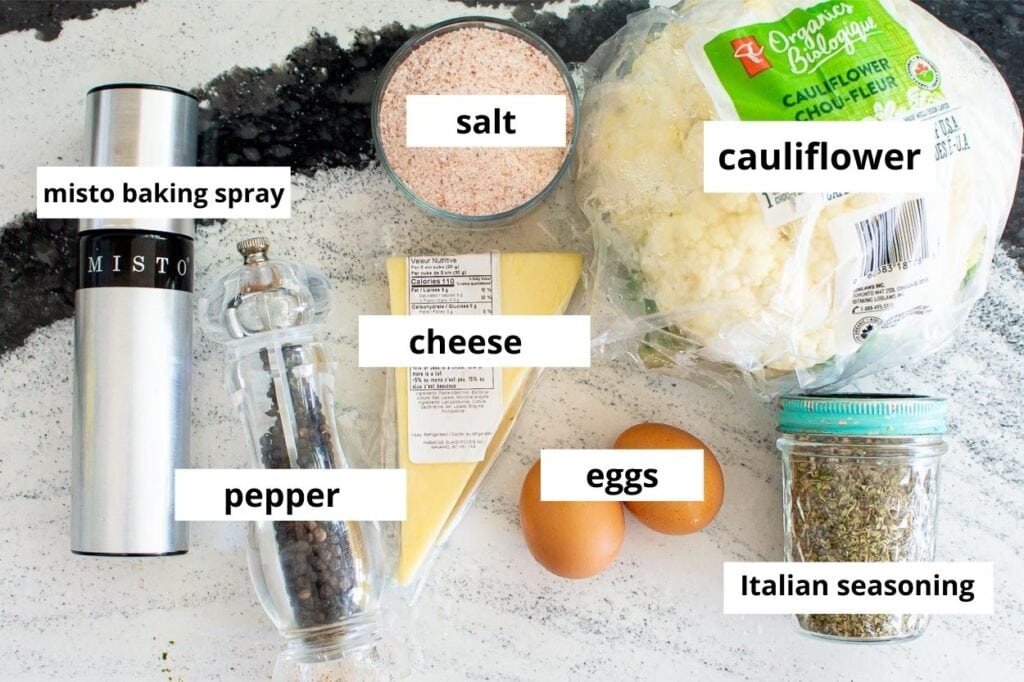
- Cauliflower: Either use a cauliflower head ( 7″ – 8″ wide, about 3 – 3.5 lbs or 4 cups-ish) or pre-riced cauliflower (exact amounts in recipe card). You can also use frozen cauliflower, enabling you to reduce or eliminate the cooking time as they’re par-cooked.
- Eggs: You can use 2 whole eggs or ¼ cup egg whites for even lighter cauliflower breadsticks.
- Cheese: I like to use freshly shredded mozzarella/Tex-Mex cheese. However, you can use any melty cheese or even a softer cheese like goat cheese. If you use mozzarella, I recommend pairing it with some parmesan for a mixture of neutral melty and harder salty flavor/texture.
- Seasonings: I love to add dried Italian seasoning. Alternatively, you could use dried basil, oregano, and/or garlic powder/onion powder along with salt and pepper.
- Dipping sauce: I love to use marinara sauce for dipping.
How to Make Cauliflower Breadsticks
While it might look like there are quite a few steps to this cauliflower breadsticks recipe, they’re all super simple! You will want to start by learning how to cut cauliflower.
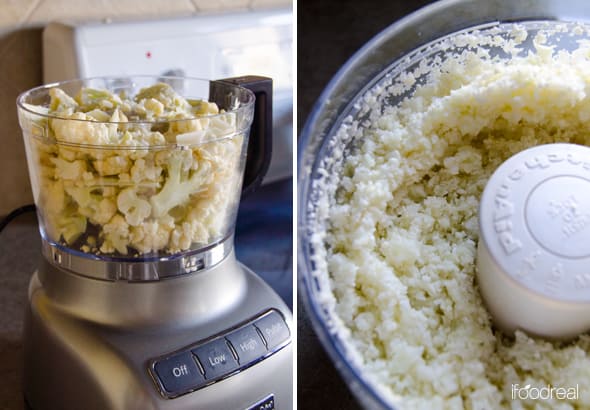
- Rice the cauliflower: First, preheat the oven to 375F/190C. Then rinse the cauliflower, remove the outer leaves, and separate it into smaller florets with a small paring knife. Transfer the florets to a food processor (do this in batches if needed) and process until it’s a rice consistency – a few coarser chunks are fine.
Alternatively, you can manually ‘shred’ the rice using a box grater – though it will obviously take quite a bit longer. Or skip this step entirely by using store-bought cauliflower rice!
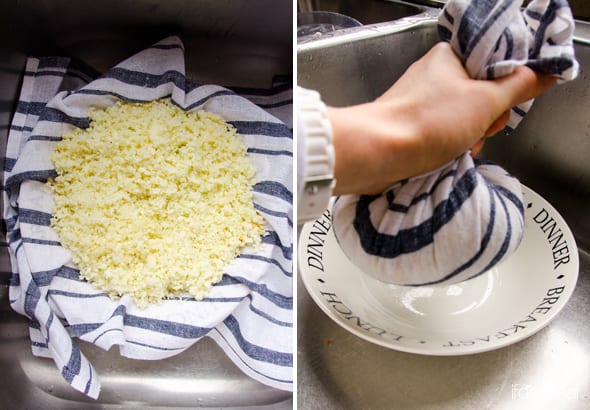
- Cook and cool it: Transfer the cauliflower rice to a large Pyrex dish and bake for 20 minutes (this will help release the juices to then squeeze out). Then remove it from the oven and transfer it to a large bowl lined with a clean tea cloth/linen towel. Allow it to cool until you can handle it (around 15 minutes for me).
You can also use a microwave to cook the riced cauliflower. Add it to a large heat-proof bowl, covered, and microwave for between 6-8 minutes, or until tender.
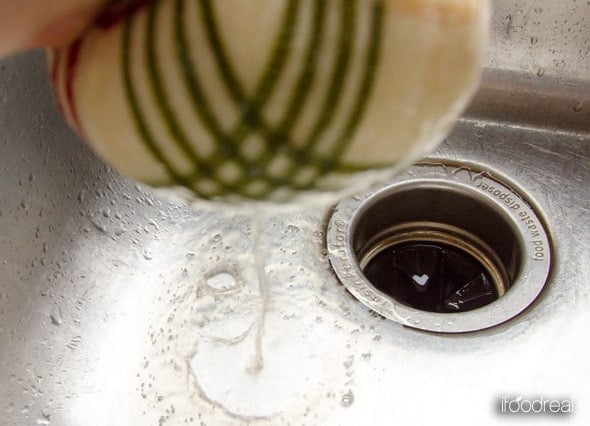
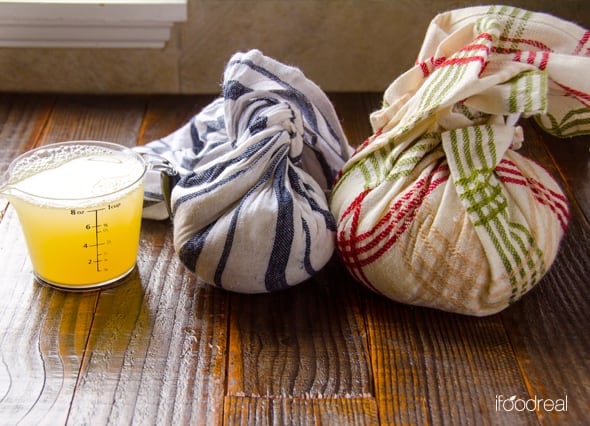
- Drain the cauliflower: Once it’s cool enough to handle, bring the edges on the tea cloth together and twist into a ‘ball.’ Use a combination of twisting the top as much as possible and squeezing the ball to squeeze out as much of the excess liquid from the cauliflower as possible.
Be patient and do this a few times with breaks in-between until barely any liquid comes out. I removed around 1 cup of liquid. Several readers have also pointed out that you can use a ricer to drain the cauliflower!
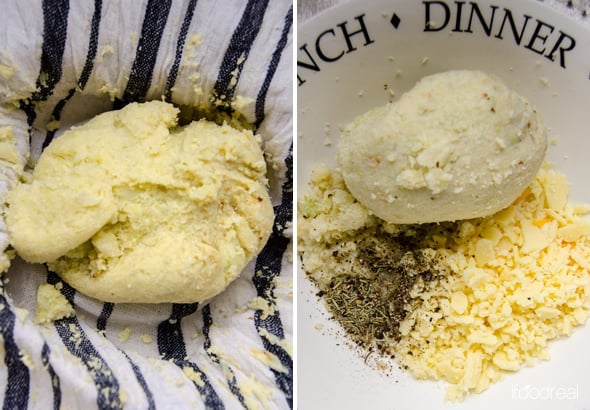
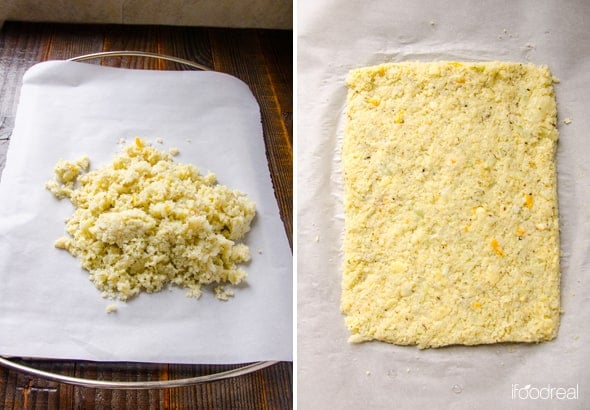
- Prepare and shape: First, increase the oven to 450F/230C. Then transfer the cauliflower to a large bowl along with the egg, ½ the cheese, and all the seasonings. Mix to combine into a ‘dough.’ Transfer the mixture to a parchment-lined baking tray and shape into the cauliflower breadstick ‘crust.’ I made a rectangle that’s around 6×7-inches and around ¼-inch thick.
This thickness is important – too thick, and it will crumble and won’t become crispy enough, too thin, and it will be too floppy but could also burn.
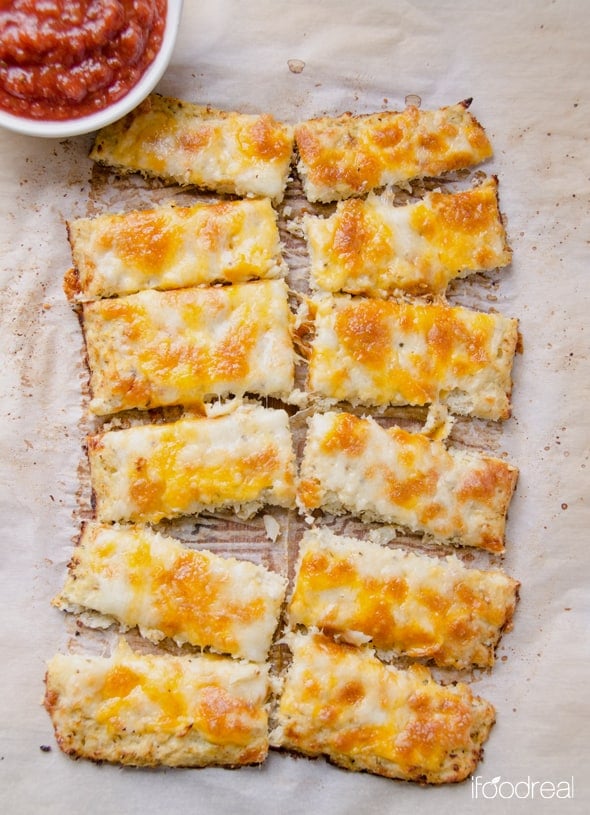
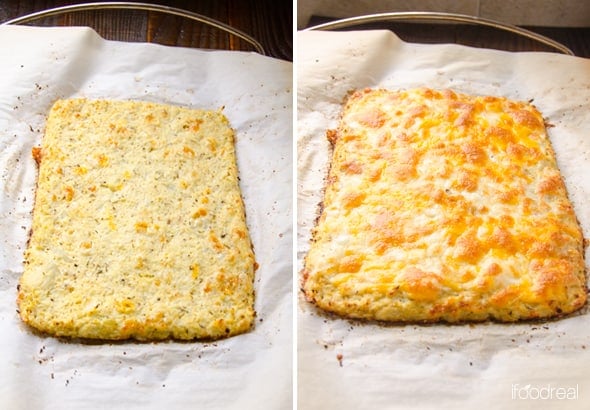
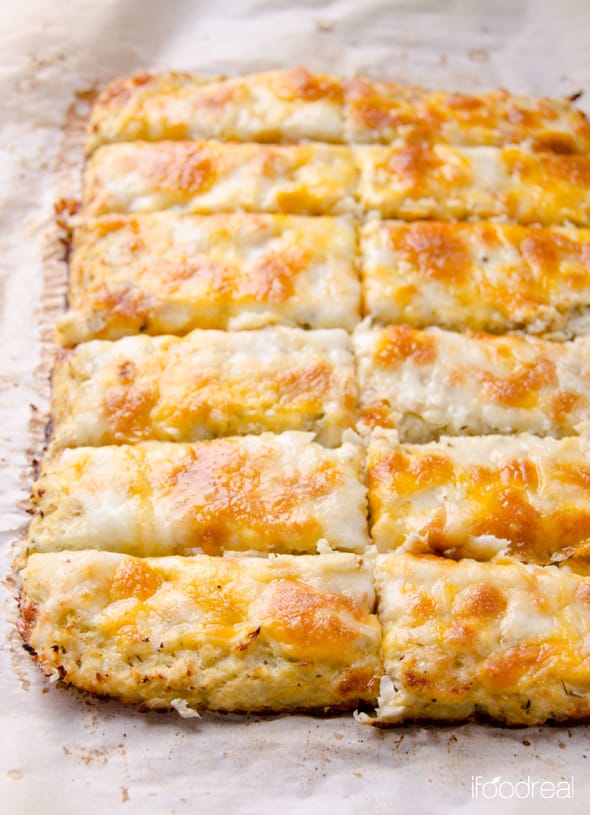
- Bake the cauliflower bread: Bake the ‘crust’ for 18 minutes, add the remaining cheese, and bake for a further 5 minutes, then broil until the cheese is golden and bubbly. Allow the cauliflower bread to cool for at least 10 minutes (they will firm up further while cooling), then cut it into 12 cauliflower breadsticks and serve warm with marinara sauce.

Optional Add-In’s and Variations
- Spice: Add a pinch of red pepper flakes or cayenne/chili powder to the cauliflower crust. Alternatively, add some finely chopped jalapeno to the cheesy topping when baking.
- Fresh herbs: Instead of dried herbs, you can pack in a flavor punch with fresh herbs like basil, oregano, and parsley.
- Toppings: The main base of these cauliflower breadsticks is the same as my cauliflower pizza crust, which means it’s excellent for holding toppings. I try to keep them minimal for these cauliflower breadsticks, though (just 1-2)—for example, olives, chili, fresh herbs, etc. Mix them into the cheese you use to top the cauliflower sticks.
- Pesto: Spreading a little pesto over the par-baked cauliflower bread before sprinkling over the cheese helps to ramp up flavor. I don’t even need the extra dipping sauce, then!
- Dairy-free: While I have yet to try this recipe with any kind of egg replacement, I do know that vegan cheese can work in this recipe (As long as it’s melty!). I recommend using a brand that’s specifically made for melting (like Violife mozzarella or Daiya).
Tips for Best Results
- Ensure you drain the cauliflower well: Squeezing the riced cauliflower may not be the most fun job, but doing it well will ensure you have crispy, not-too-floppy cauliflower bread.
- For even crispier results: Before topping the par-baked cauliflower breadsticks with the remaining cheese, flip the crust over (by flipping the parchment paper to allow it to transfer to a new bit of parchment paper) and bake for a few minutes before adding the cheese and continuing with the recipe as written.
- For a ‘lighter’ version: You can skip the cheesy topping and only use cheese within the actual cauliflower mixture.
- To avoid sticking to the parchment: I’ve never had this issue, but several readers have. To prevent this, use a little cooking spray on the parchment before adding the cauliflower breadstick mixture. Alternatively, use a Silpat silicone sheet or pizza stone.
- If you need additional binder: Sometimes, the cauliflower rice can seem particularly wet – even after draining it- and won’t form a nice ‘dough.’ In that case, I’ll sometimes add almond flour (or ground flaxseed) as an additional binder along with the eggs and cheese. Add 1tbsp at a time until the mixture has more ‘structure’ (is less ‘loose’). This will help soak up any extra liquid you couldn’t squeeze out, so you still have crispy results.
- To avoid manually squeezing: If you have a juicer, several readers have stated that this works well to drain the juice, and the remaining pulp can be used for these cheesy cauliflower breadsticks.
- Save the squeezed liquid: It’s filled with nutrients and can be added to soups, sauces, or even smoothies.
FAQs
Any melty cheese works (full or low fat), Mozzarella cheese or Tex Mex, or even Parmesan. Use freshly grated cheese and when measuring, do not pack it in the cup.
The cheese is an important ‘binder’ in the recipes, so no. You may be able to use a melty dairy-free cheese in its’ place and you can omit the cheesy topping – but don’t omit the cheese within the cauliflower bread ‘dough’.
Though I’ve never had issues with sticking, some readers have. For that reason, I recommend using a little cooking spray- just in case!
You can, but I’d still recommend lining it with parchment paper to avoid sticking.
Yes. You can use store bought cauliflower rice as well. One bag should do it. These days it’s widely available in Walmart, Trader Joe’s, Costco etc.
You sure can – you can freeze the unbaked or baked cauliflower breadsticks for up to three months. Read the storage section for more instructions.
Honestly, I’ve never tried and can’t guarantee results. However, several readers have tried substitutes with success including:
• Using ground chia/flax eggs – by combining 1 tbsp ground seeds with 3tbsp water per egg. Combine the two ingredients, mix, and allow to thicken for 5 minutes before using.
• Using 1tbsp cornstarch and 2tbsp water in place of the egg whites.

Serving Recommendations
My favorite way to enjoy these cauliflower cheese breadsticks is with a delicious dipping sauce, including:
- Warm marinara sauce – You can use homemade marinara or any clean/organic store-bought marinara.
- Ranch dressing – I have a healthy ranch dressing that pairs perfectly with these cauliflower sticks! Try healthy Caesar dressing, too for variety!
- Pizza night: An addition to low carb almond flour pizza crust with your favorite toppings!
You can also enjoy these low carb cheesy breadsticks as part of a party spread alongside other simple appetizers like parmesan mushrooms and air fried wings.
How to Make and Store
Make ahead: You can prepare and shape the cauliflower sticks (unbaked without the extra cheese topping), then freeze the breadstick crust on the tray until solid before wrapping tightly with plastic wrap. Allow them to thaw before topping with the additional cheese and baking as instructed.
Storing: I recommend eating the cauliflower cheese breadsticks the same day. Unlike borscht, they don’t keep well. However, you can store any leftovers in an airtight container in the fridge for up to 2 days.
Freeze: Allow the baked keto breadsticks to cool completely, then freeze on a baking tray until solid. Once solid, wrap tightly in plastic wrap and store in the freezer for up to one month. Allow it to thaw in the fridge before reheating.
Reheat: Reheat the cauliflower cheese bread sticks in the oven (crispier) at 350F/175C until warm or in the microwave (softer) until warmed through.
More Low Carb Cauliflower Recipes
- Cauliflower pizza crust – foolproof recipe with 5 star reviews. Make 2!
- Vegan cauliflower pizza crust – made without eggs and cheese.
- Cauliflower risotto – for a low carb date night in quality meal.
- Cauliflower mashed potatoes – same creamy and comforting but low carb.
- Cauliflower biscuits that are so good!
- Cheesy cauliflower steaks
Cauliflower Breadsticks
Ingredients
- 1 large head of cauliflower 7″ – 8″ wide and 3-3.5 lbs, 6 cups riced cauliflower or 16-18 oz bag of store bought cauliflower rice
- 1/4 cup egg whites or 2 large eggs
- 1 1/4 cups Mozzarella/Tex Mex cheese shredded
- 1 tsp Italian seasoning, dried oregano or basil
- 1/4 tsp ground black pepper
- Pinch of salt
- Marinara sauce for dipping
- Cooking spray I use Misto*
Instructions
- Preheat oven to 375 degrees F. Rinse cauliflower, remove outer leaves and separate into florets with a paring knife. Place cauliflower florets in a food processor and process until “rice” texture. Some coarse chunks are fine.
- Place in an ovenproof baking dish (I used Pyrex pie dish) and bake for 20 mins. Remove cooked cauliflower from the oven and transfer to a bowl lined with a tea/linen towel. Let the cauliflower cool down a bit until it is safe to touch, about 15 minutes.
- Fold the towel holding by the ends and squeeze the liquid out of the cauliflower “ball” as hard as you can. Be patient and do this a few times until barely any liquid comes out. I squeezed out 1 cup of liquid.
- Increase oven T to 450 degrees F. Transfer cauliflower to a mixing bowl along with egg whites, 1/2 cup cheese, herb seasoning, black pepper, pinch of salt and mix to combine.
- Transfer cauliflower mixture onto the baking sheet lined with unbleached parchment paper. Flatten with your hands into a rectangle, approximately 9″ x 7″ size and 1/4″ thick.
- Bake for 18 minutes, remove from the oven and top with remaining 3/4 cup cheese. Bake for another 5 minutes and then broil until cheese turns golden brown. Cut into 12 breadsticks and serve hot with warm marinara sauce, if desired. P.S. For a lighter version, do not top with cheese.
Notes
- Make ahead: Prepare and shape the cauliflower sticks (without extra cheese topping), then freeze the unbaked breadstick crust until solid. Allow them to thaw before topping with the additional cheese and baking as instructed.
- Store: Refrigerate covered for up to 2 days. You can also freeze the breadsticks tightly wrapped in plastic, for up to 1 month. Thaw on a counter or in a microwave.
- Reheat: Cauliflower cheese bread sticks in the oven (crispier) at 350F/175C until warm or in the microwave (softer) until warmed through.
- *Some people have reported their cauliflower breadsticks sticking to parchment paper, so if in doubt – spray with cooking spray. Mine didn’t.



I am trying these on Thursday, I was wondering if I can use the whole egg instead of just the whites and have it turn out the same? I don’t want to waste the yolks. 🙂 I’m excited to try these!
Yes you can.
We just made these… love the flavor but they did not come off of the parchment paper as stated so they all had to be torn off into scraps. Took an hour and a half from start to finish. Lots of time to get a few scraps 🙁
Thanks for your wonderful detailed instructions and pictures. I mixed the cheese (cheddar) right into the batter. Then I spread a little bit of pesto on top with a bit of parmesan cheese. They came out perfectly. My guests thought it was focaccio. I added garlic powder but next time I will put roasted garlic cloves in the batter. The kids really enjoyed them. My only issue is that I was burning my hands trying to squeeze out the water. Next time I will make earlier in the day so that it can cool first or I will use a potato ricer as suggested by another reader.
Great to hear!:)
I tried this tonight and it turned out beautifully! No one in the house believed it was gluten free and made with cauliflower!
I added three chopped green onions and two cloves of garlic – it was so delicious!
I can’t believe this is cauliflower! I was sent a link to this in a Yummly email today so I ran out and grabbed some cauliflower. My husband and I just had it and it is nuts! It is so so good and there is no cauliflower taste!
Thank you for your blog! I am excited to try more of your recipes!
You are welcome! Let me know what else you try.:)
Hi… just wanted to say thank you for the recipes, going to try one this evening…. your story was inspiring and your right anybody can change their eating habits, just have to fond tasty recipes that my family will enjoy! Thanks again for sharing…
You are welcome! Yes, no excuses.
I used to throw the broth from the cauliflower down the drain. Then I am so happy I realized that it was valuable vegetable broth. You can drink it or save it for soups or other dishes that require vegetable broth.
That is an excellent point!!! Thank you!
Excellent! Without the marinara sauce it tastes like cauliflower but with the marinara sauce it tastes just like (even better) than mozzarella sticks. SO good. Well worth the effort to make. I will double the recipe next time. Thanks for sharing.
Yummy! Thank you for your time and effort posting this with detailed instructions. Mine turned out just right!!
These taste great. That being said here are my thoughts: Make SURE you grease your pan/paper/foil! Nothing worse than looking at your beautiful masterpiece and then eating it with parchment paper. Second…my edges were perfect, middle not so much. I may burn my edges a bit next time. And lastly for those of u saying people didn’t know it wasn’t bread sticks…have they ever had a bread stick? Lol just don’t want people to have unrealistic expectations 🙂 its more like a cheese cracker, which is why people like it so much I imagine. Who doesn’t love cheese?. This recipe is like 80% cheese. Tasty, but basically baked cheese. Mine was kind of thin, but I can’t imagine it would have turned out if it were any thicker let alone the thickness of a bread stick! Not trying to be a downer, I did really like this recipe and will most likely make it again just wanted to give a realistic comment 🙂 Good appetizer finger food, not a good replacement for a “bread stick.” Which I think should be pretty obvious 🙂 Thanks for the recipe, tasty stuff!